How to Plan A Thanksgiving Feast in A Bullet Journal
Hello my friends! I’m Dayna—@daynadoodles on Instagram—and I’m going to show you how to create a Thanksgiving bullet journal spread so you can have your Thanksgiving recipes (mine are based off of my mom’s Thanksgiving dinner ^_^) and ingredients all in one place.
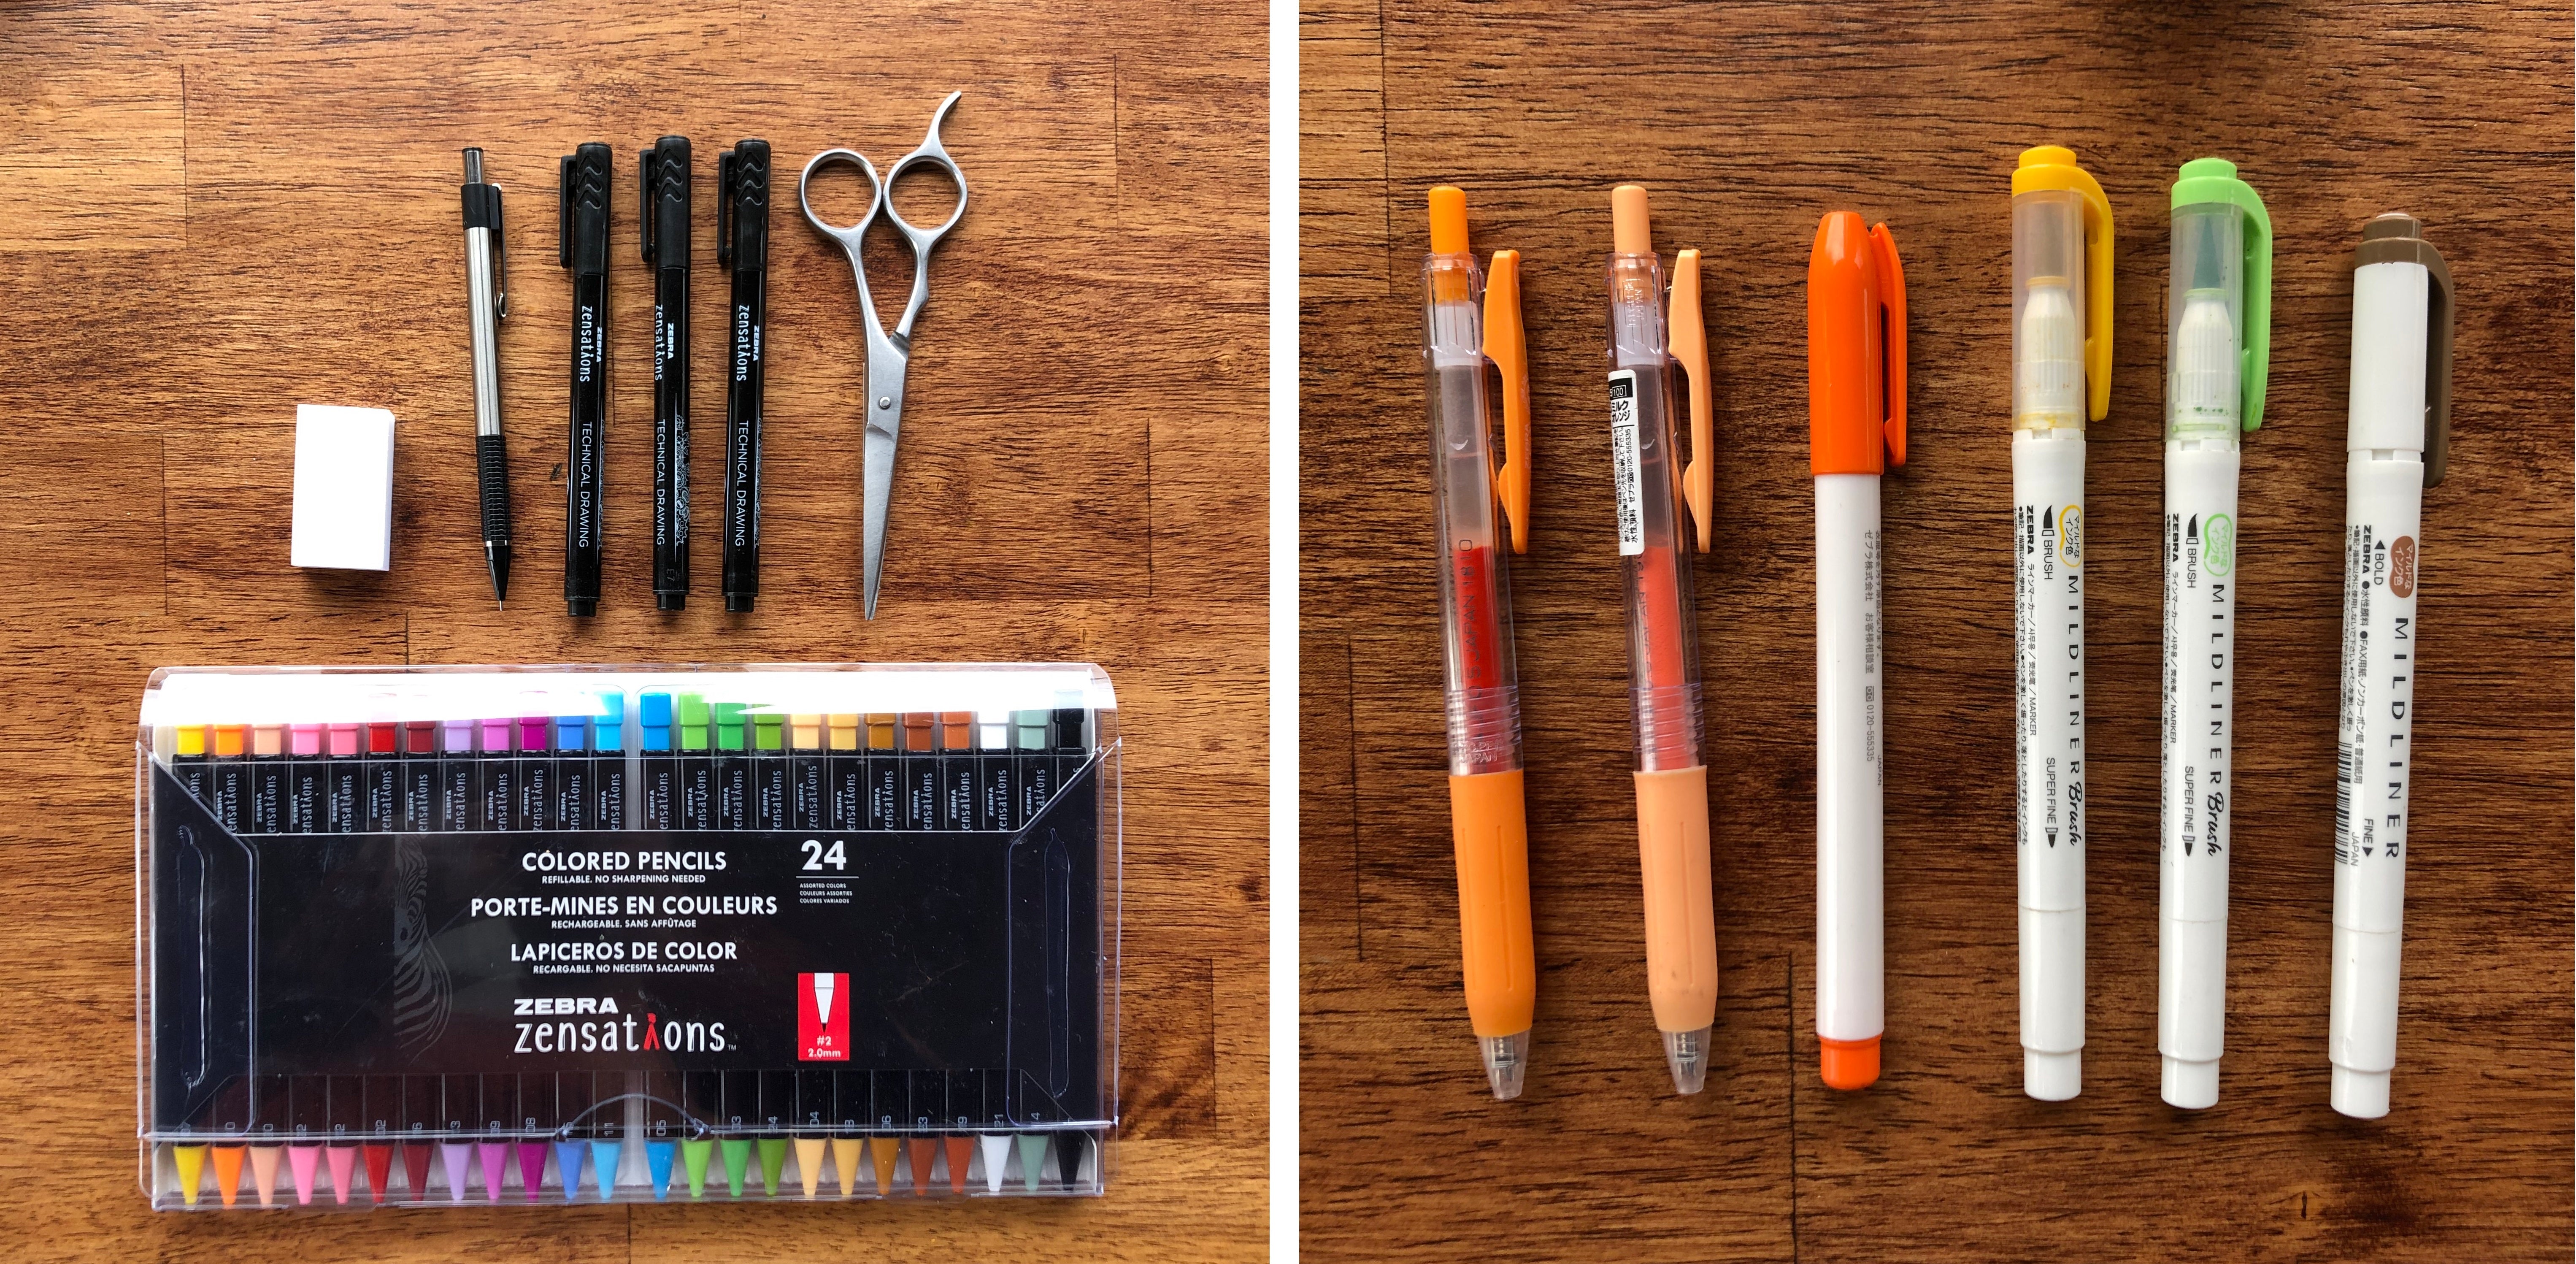
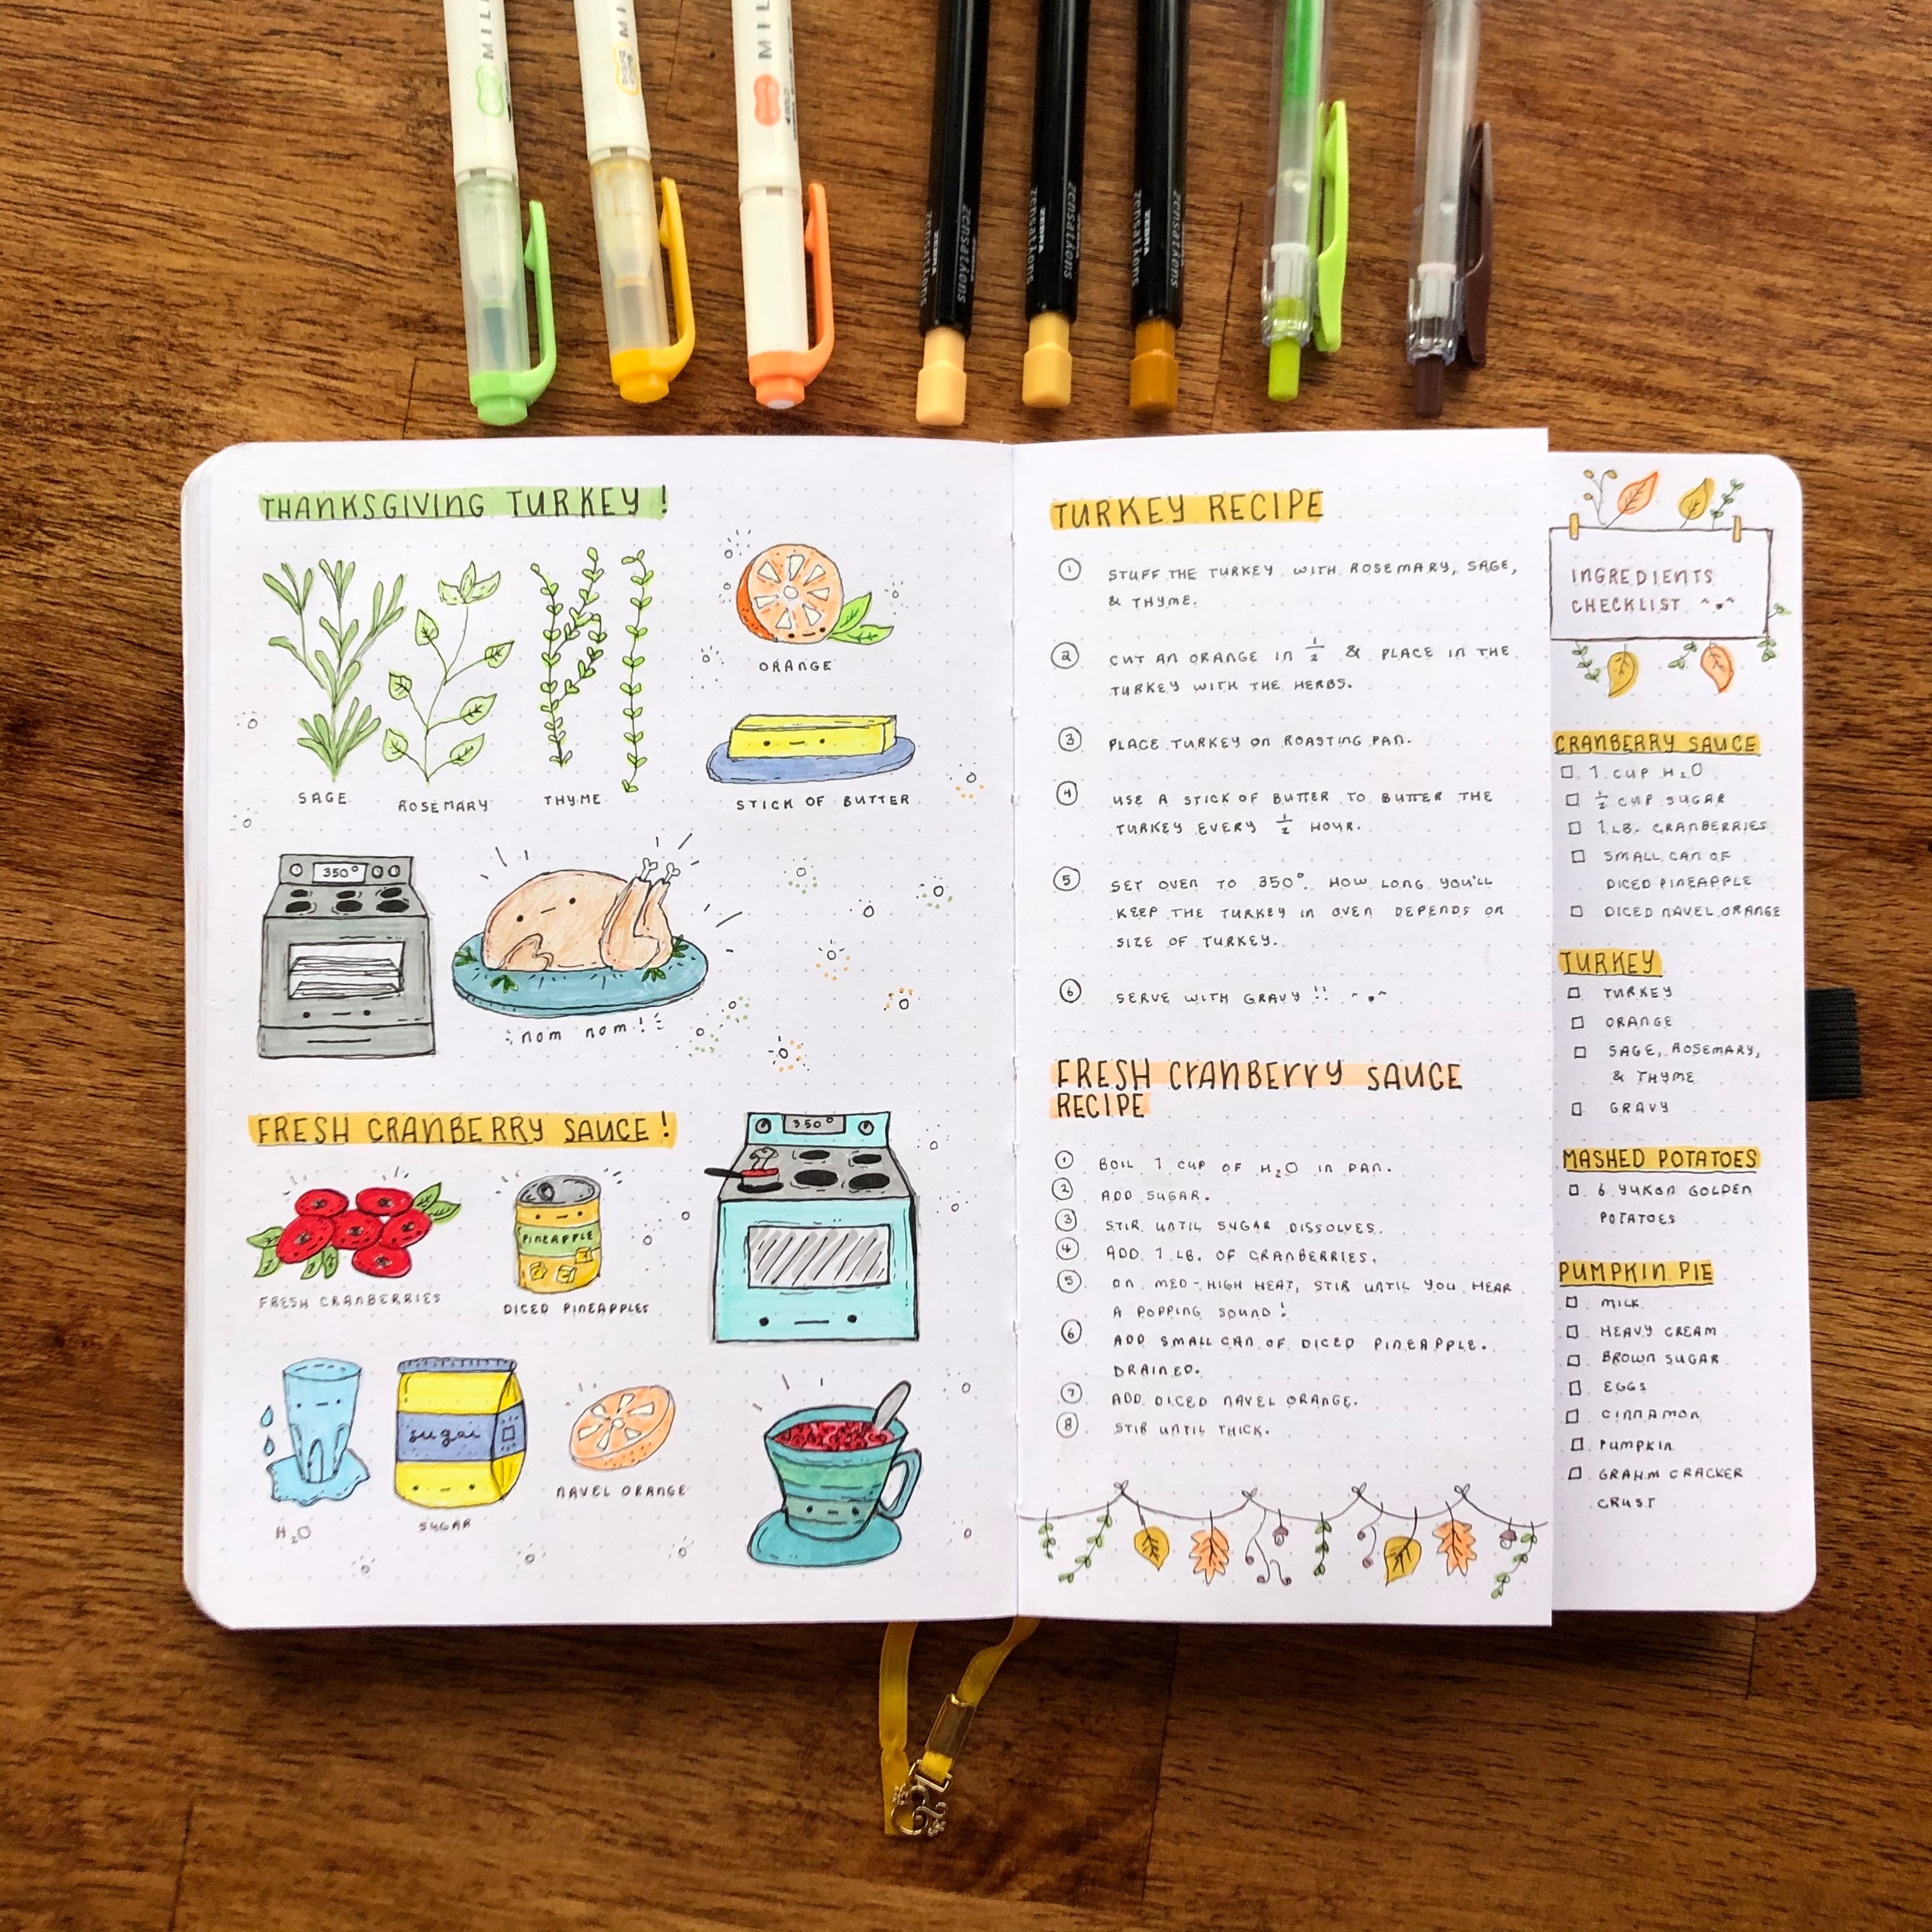
To get started, first create a Dutch Door on the pages in your bullet journal by simply cutting the edge of the page. A “Dutch Door” describes a bullet journal spread where some of the pages are cut down, giving the illusion of Dutch Doors (doors that have been cut in half horizontally). In doing this, the page underneath is stationary, while still being part of the spread on the previous page. The Dutch Door will contain the recipes and my ingredients checklist will be on the page behind it, along the edge.Next, sketch out the recipes, ingredients list, and doodles with STEEL M-301 Mechanical Pen. I love this sleek mechanical pencil because the lead is light so I don’t have any trouble erasing the pencil lines after outlining them. Plus, there is a hidden eraser under the metal cap, which is a life saver when you have a cat that likes to take all of my erasers!
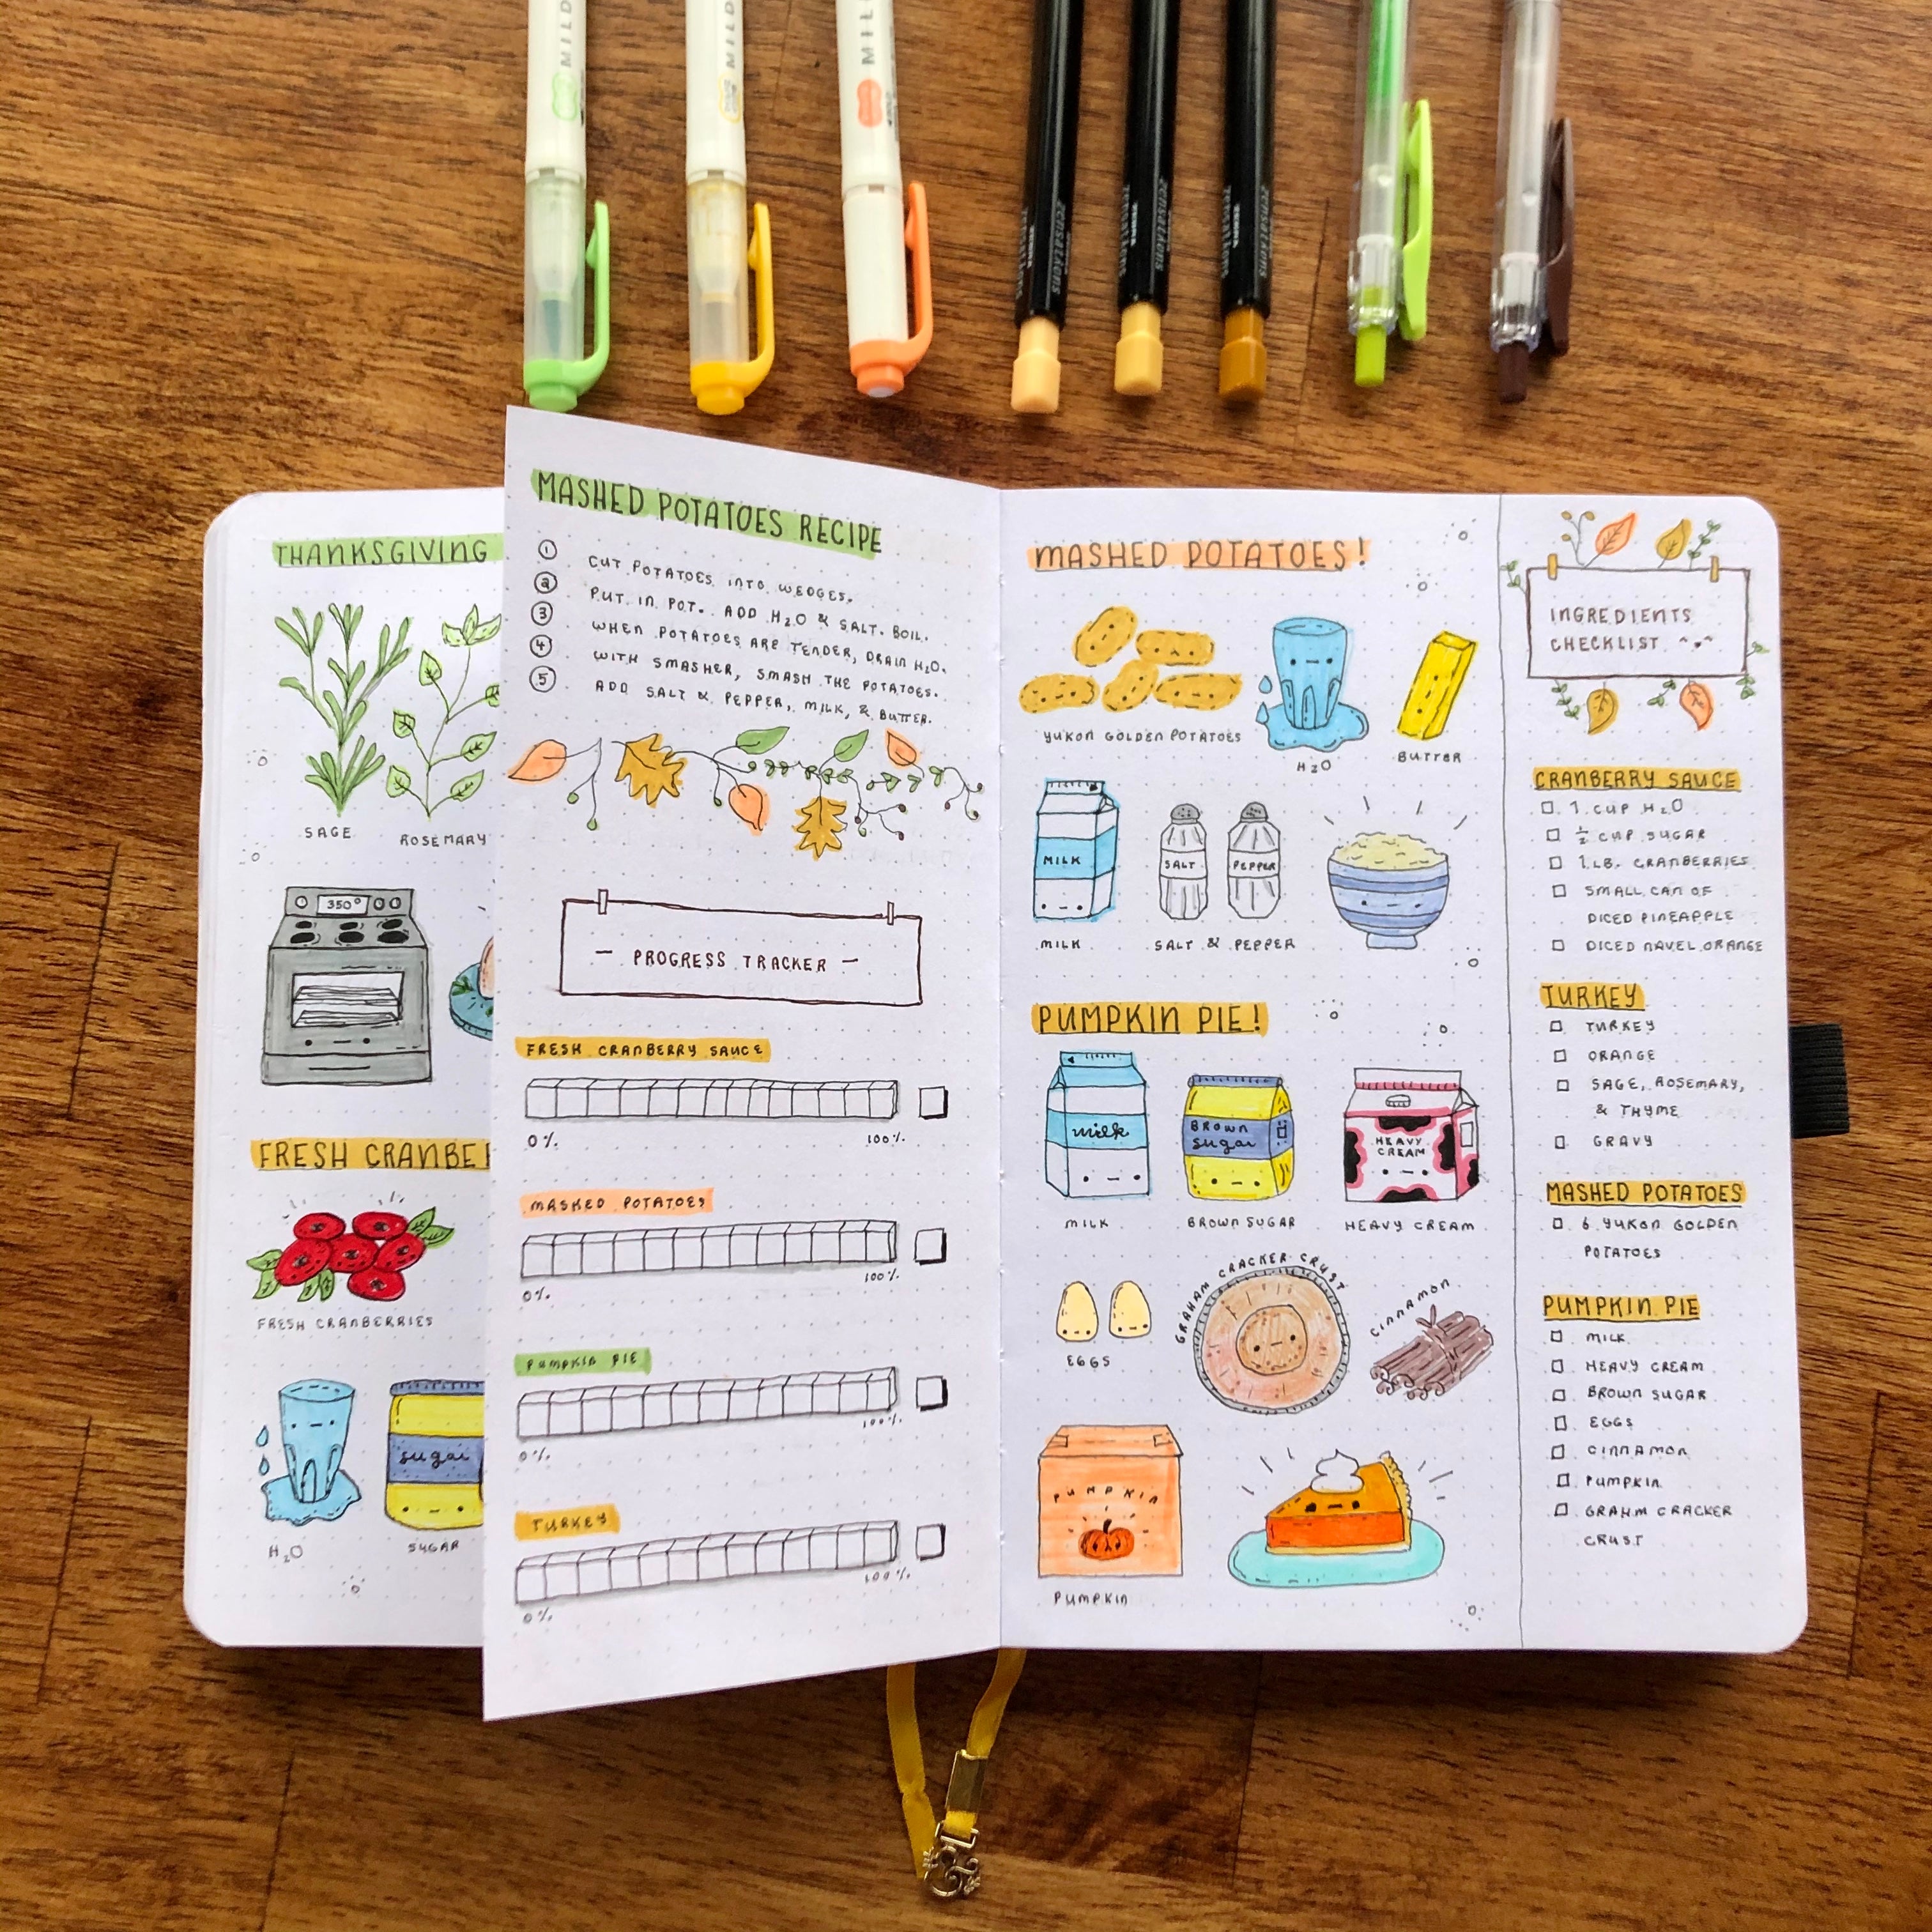
I created an ingredients checklist on the Dutch Door that included ingredients for cranberry sauce, the turkey, mashed potatoes, and pumpkin pie. Then I used the pages to the left to write out the steps of each recipe, and then fun doodles to add some creativity to the spread.
Step 2: Outline in Fine-tipped Marker
Next, use the Zensations Technical Drawing Pen in 0.1mm to write over the recipes and ingredients. These fine-point marker pens are perfect for writing, sketching, or outlining in various sizes. The ink doesn’t bleed through paper nor does it smudge when erasing pencil lines. These pens offer a lot of flexibility because they’re easy to use when maintaining precise controlled lines—including light, wispy ones.
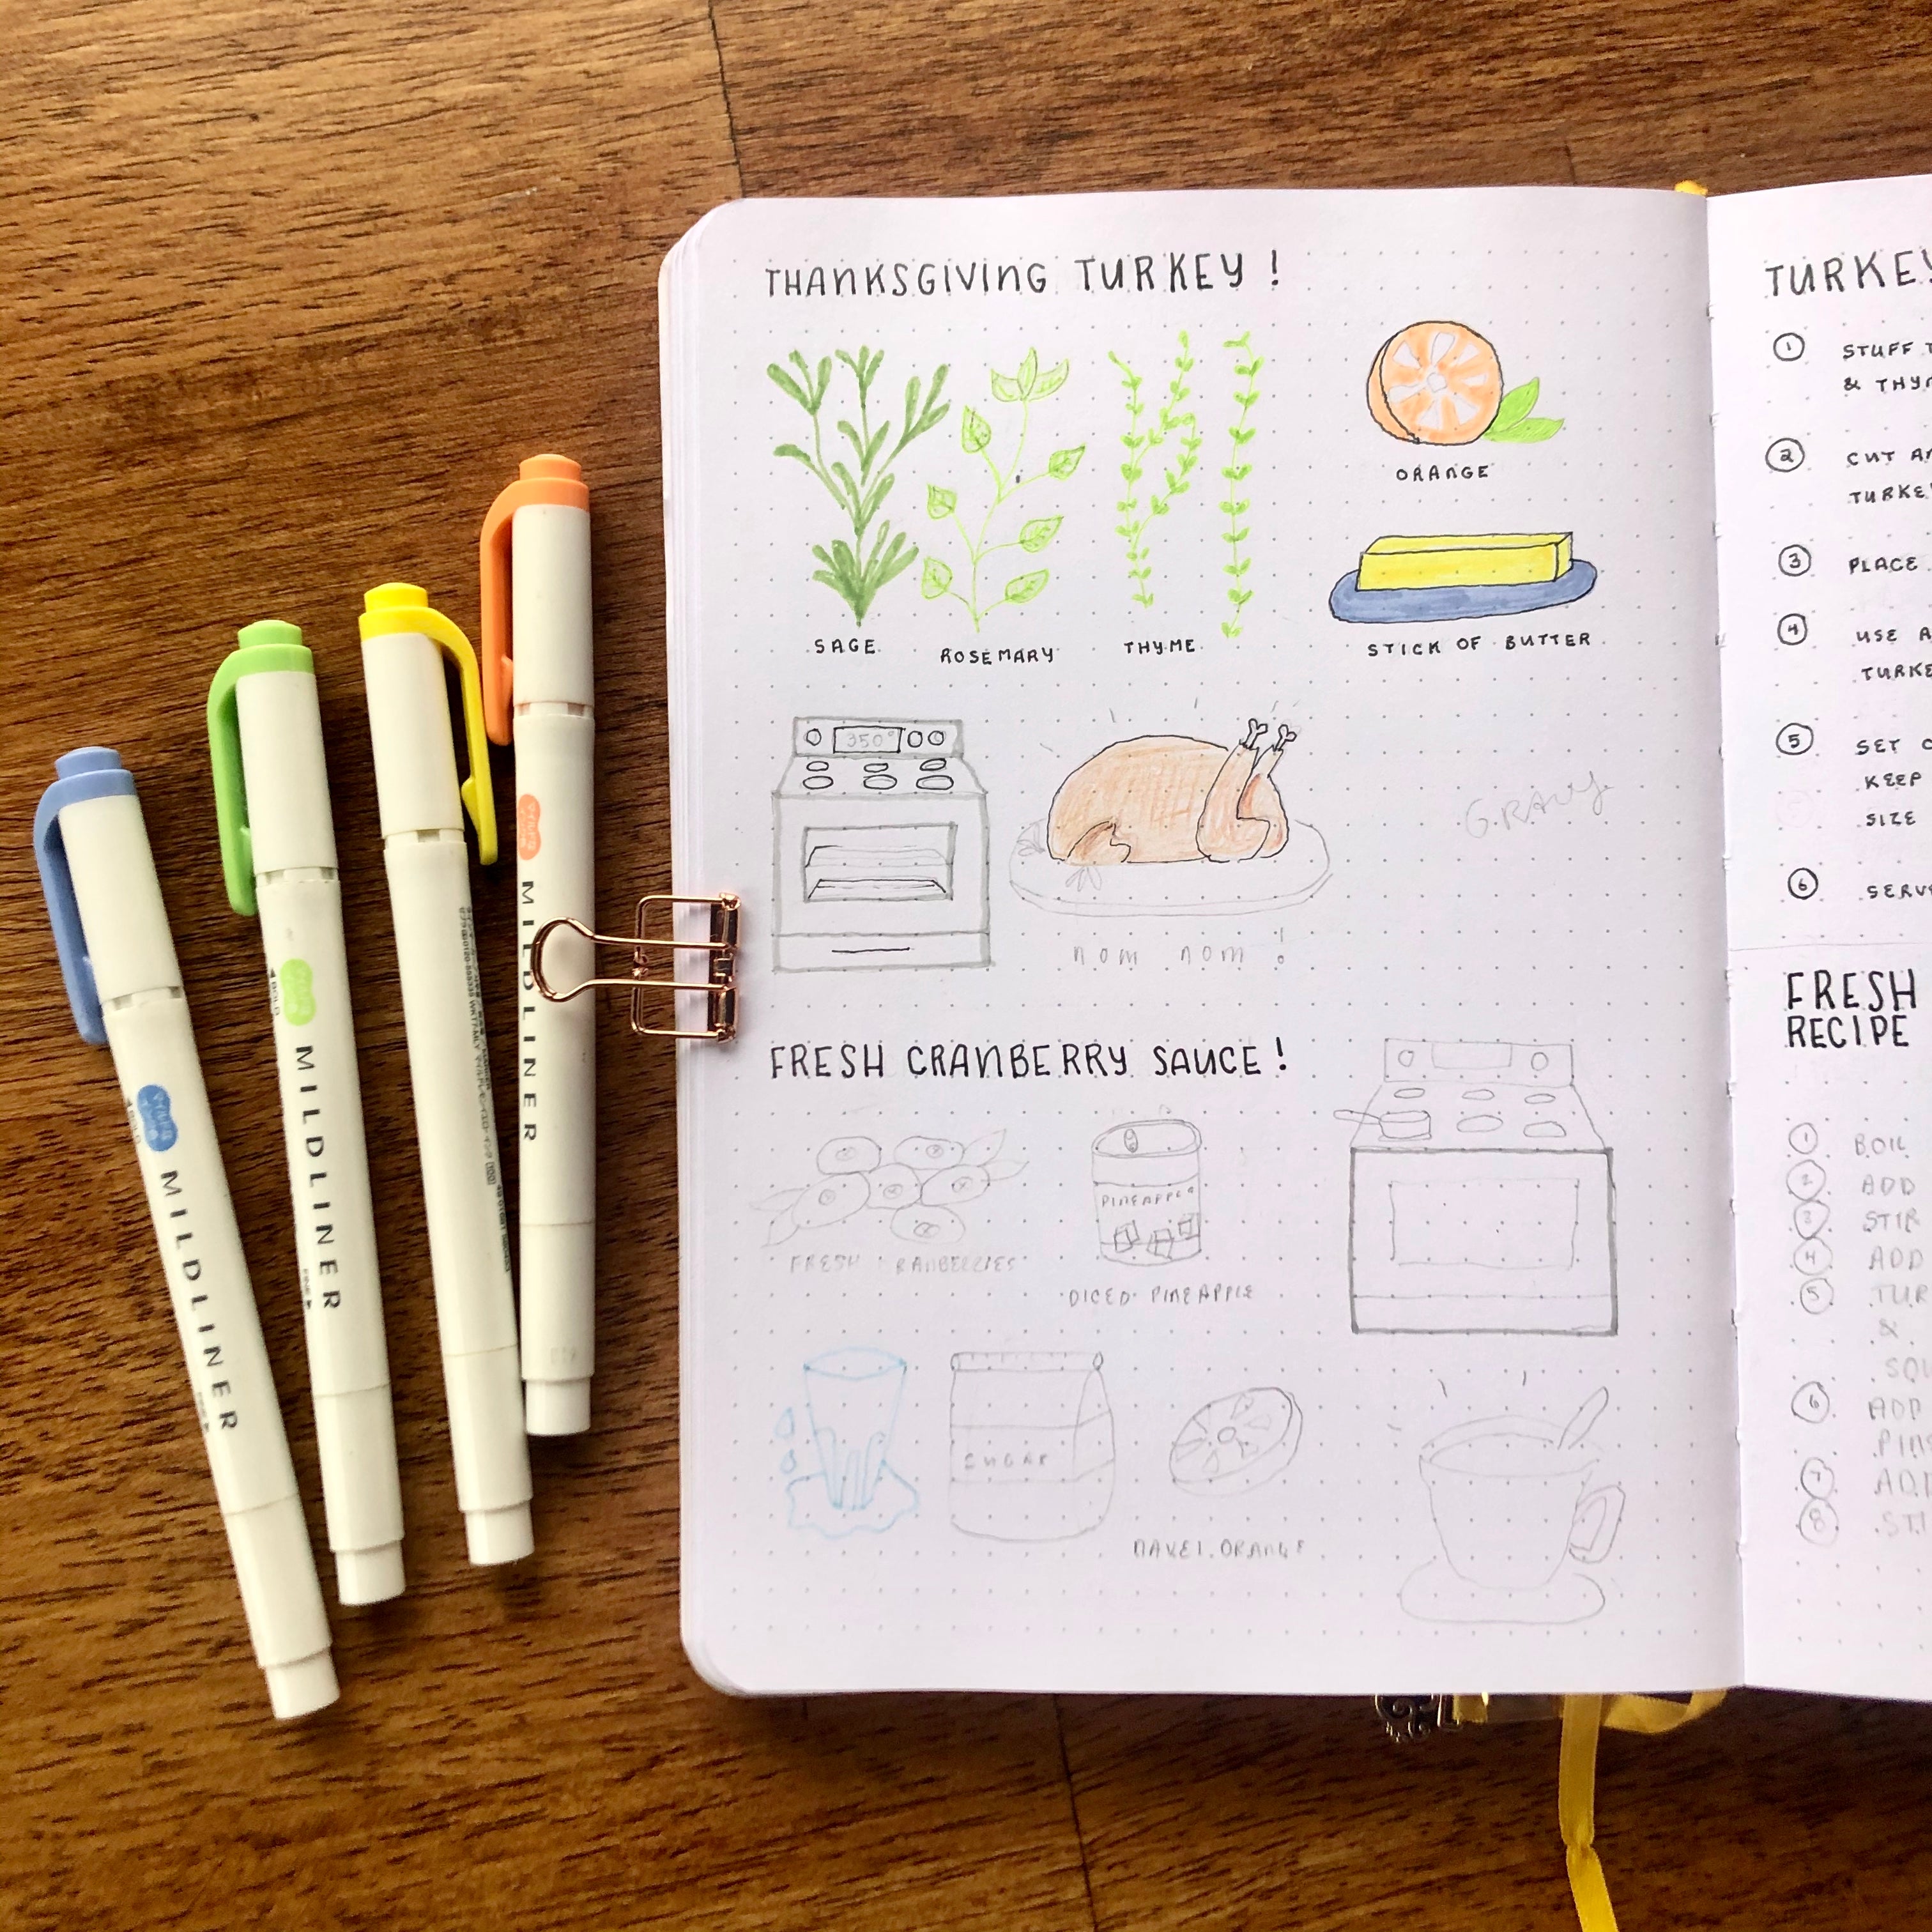
The next step is to outline the doodles! I usually don’t know where my creative process is going to take me, so depending on the look I’m going for, I’ll either outline my sketches in black ink, fine tip marker, or gel pen. First, I started with outlining the sage, rosemary, and thyme doodles with the Sarasa Clip Gel Retractable Pen in neon green. These gel pens are so fun because they’re available in an array of colors from milky to metallic, pastel to vibrant…and they write so silky smooth! Plus, they don’t bleed through paper and won’t smudge like other gel pens.
When I want to outline with a fine tip, I use my go-to markers: Mildliner Highlighters (which I’ll talk more about in step 3) or ClickArt Retractable Marker Pens. These ClickArt marker pens are retractable, which is another handy design when you have cats that take your pen caps!
Step 3: Color
Next, start coloring in the doodles. For this spread, I used several Mildliner Brush Pen colors to gradually shade in the doodles. These are my favorite bullet journal markers because they’re available in several assorted color packs from fluorescent neon colors, soft mild colors, warm autumn colors, and more.
I love the dual-tip option so I can either outline in crisp, clean lines with the fine tip or layer with broad strokes with the brush tip side.
For an amazing autumn look, use the orange, green, and gold markers from Zebra’s Mildliner Brush Pen collection.
I also like to experiment with different materials while bullet journaling. I found that Zensations Technical Drawing Pens are awesome for coloring in your doodles as a base shade. I like to then use Mildliner Highlighters to blend overtop.
Continue sketching, outlining, and coloring in your doodles until they are complete!
Step 4: Add in a Progress Tracker
My creative process can change from one minute to the next so as I was creating this spread, I thought it would be fun to include a progress tracker to track how far along I am with the Thanksgiving preparation. I like creating spreads where I can capture everything on one page so I can quickly see what still needs to be completed. I sketched the progress tracker on the back side of the Dutch Door with the STEEL M-301 Mechanical Pen, then outlined it with the Zensations Technical Drawing Pens for a sleek finish!
Step 5: Add the Final Touches
My creative process involves a lot of switching between sketching, outlining, and coloring because I come up with various ideas throughout the process (like that progress tracker). I decided as I worked on this spread to highlight over the Progress Tracker labels with the Mildliner Highlighters.
Add some of your own final touches and then your Thanksgiving recipes, ingredients checklist, and progress tracker are complete!
And there you have it! I hope this gives you some inspiration for your own Thanksgiving bullet journal spread. To see more of my work, head over to @daynadoodles on Instagram. For more bullet journal tutorials, check out How to Create a Minimalist Bullet Journal.


 Next, sketch out the recipes, ingredients list, and doodles with STEEL M-301 Mechanical Pen. I love this sleek mechanical pencil because the lead is light so I don’t have any trouble erasing the pencil lines after outlining them. Plus, there is a hidden eraser under the metal cap, which is a life saver when you have a cat that likes to take all of my erasers!
I created an ingredients checklist on the Dutch Door that included ingredients for cranberry sauce, the turkey, mashed potatoes, and pumpkin pie. Then I used the pages to the left to write out the steps of each recipe, and then fun doodles to add some creativity to the spread.
Next, sketch out the recipes, ingredients list, and doodles with STEEL M-301 Mechanical Pen. I love this sleek mechanical pencil because the lead is light so I don’t have any trouble erasing the pencil lines after outlining them. Plus, there is a hidden eraser under the metal cap, which is a life saver when you have a cat that likes to take all of my erasers!
I created an ingredients checklist on the Dutch Door that included ingredients for cranberry sauce, the turkey, mashed potatoes, and pumpkin pie. Then I used the pages to the left to write out the steps of each recipe, and then fun doodles to add some creativity to the spread.
 When I want to outline with a fine tip, I use my go-to markers: Mildliner Highlighters (which I’ll talk more about in step 3) or ClickArt Retractable Marker Pens. These ClickArt marker pens are retractable, which is another handy design when you have cats that take your pen caps!

 For an amazing autumn look, use the orange, green, and gold markers from Zebra’s Mildliner Brush Pen collection.
I also like to experiment with different materials while bullet journaling. I found that Zensations Technical Drawing Pens are awesome for coloring in your doodles as a base shade. I like to then use Mildliner Highlighters to blend overtop.
For an amazing autumn look, use the orange, green, and gold markers from Zebra’s Mildliner Brush Pen collection.
I also like to experiment with different materials while bullet journaling. I found that Zensations Technical Drawing Pens are awesome for coloring in your doodles as a base shade. I like to then use Mildliner Highlighters to blend overtop.
 Continue sketching, outlining, and coloring in your doodles until they are complete!
 Add some of your own final touches and then your Thanksgiving recipes, ingredients checklist, and progress tracker are complete!
And there you have it! I hope this gives you some inspiration for your own Thanksgiving bullet journal spread. To see more of my work, head over to @daynadoodles on Instagram. For more bullet journal tutorials, check out How to Create a Minimalist Bullet Journal.
Add some of your own final touches and then your Thanksgiving recipes, ingredients checklist, and progress tracker are complete!
And there you have it! I hope this gives you some inspiration for your own Thanksgiving bullet journal spread. To see more of my work, head over to @daynadoodles on Instagram. For more bullet journal tutorials, check out How to Create a Minimalist Bullet Journal.