Hey everyone! It’s Angie from @anjcreativeletters and I am here to show you an easy and simple way to design your envelopes for the holiday season. Let’s begin!
Along the edges of the envelope, draw some Christmas lights using the Zensations Drafix Technical Pencil. It may be helpful to start with a line with some curves and loops.
2. Trace your pencil sketch with the Zensations Technical Drawing Pen. This comes in six different point sizes. I used the 0.8 mm size tip for this project.
3. Let’s add the lights! Using the Kirarich Glitter Highlighters, simply add in some little circles on alternate sides of the line you traced with different colors, mimicking Christmas lights. Make sure you fill in the circles with solid color.
4. Then, hand-letter the name and mailing address of your card recipient using the Funwari Brush Pen. I used the vibrant red color to give it a festive feel.
Tips for adding creative flair to the mailing address:
Write the recipient’s name in cursive but write the address in print
Emphasize the state (also in cursive), then write the zip code on its own line
The materials I used for this project are perfect because of the glitter effect of the Kirarich Glitter Highlighters. It makes the design stand out and looks beautiful!
Using the Zensations Drafix Technical Pencil, draw a big circle as a guide for the wreath. Don’t worry, it doesn’t have to be a perfect circle.
2. With the ClickArt Retractable Marker Pen in Black, draw some leaves and different size circles and leaf shapes around the circle.
3. Next, color the leaves and the circles with the ClickArt Pens: Green for leaves and red for the berries.
4. Then, add the card recipient’s name and mailing address in the middle of the wreath using the ClickArt Pen in Black.
The ClickArt Retractable Pens are perfect for this project because of the felt tip. They are easy to use especially when coloring the leaves and the circles. The capless design makes it easy to quickly switch between colors, too.
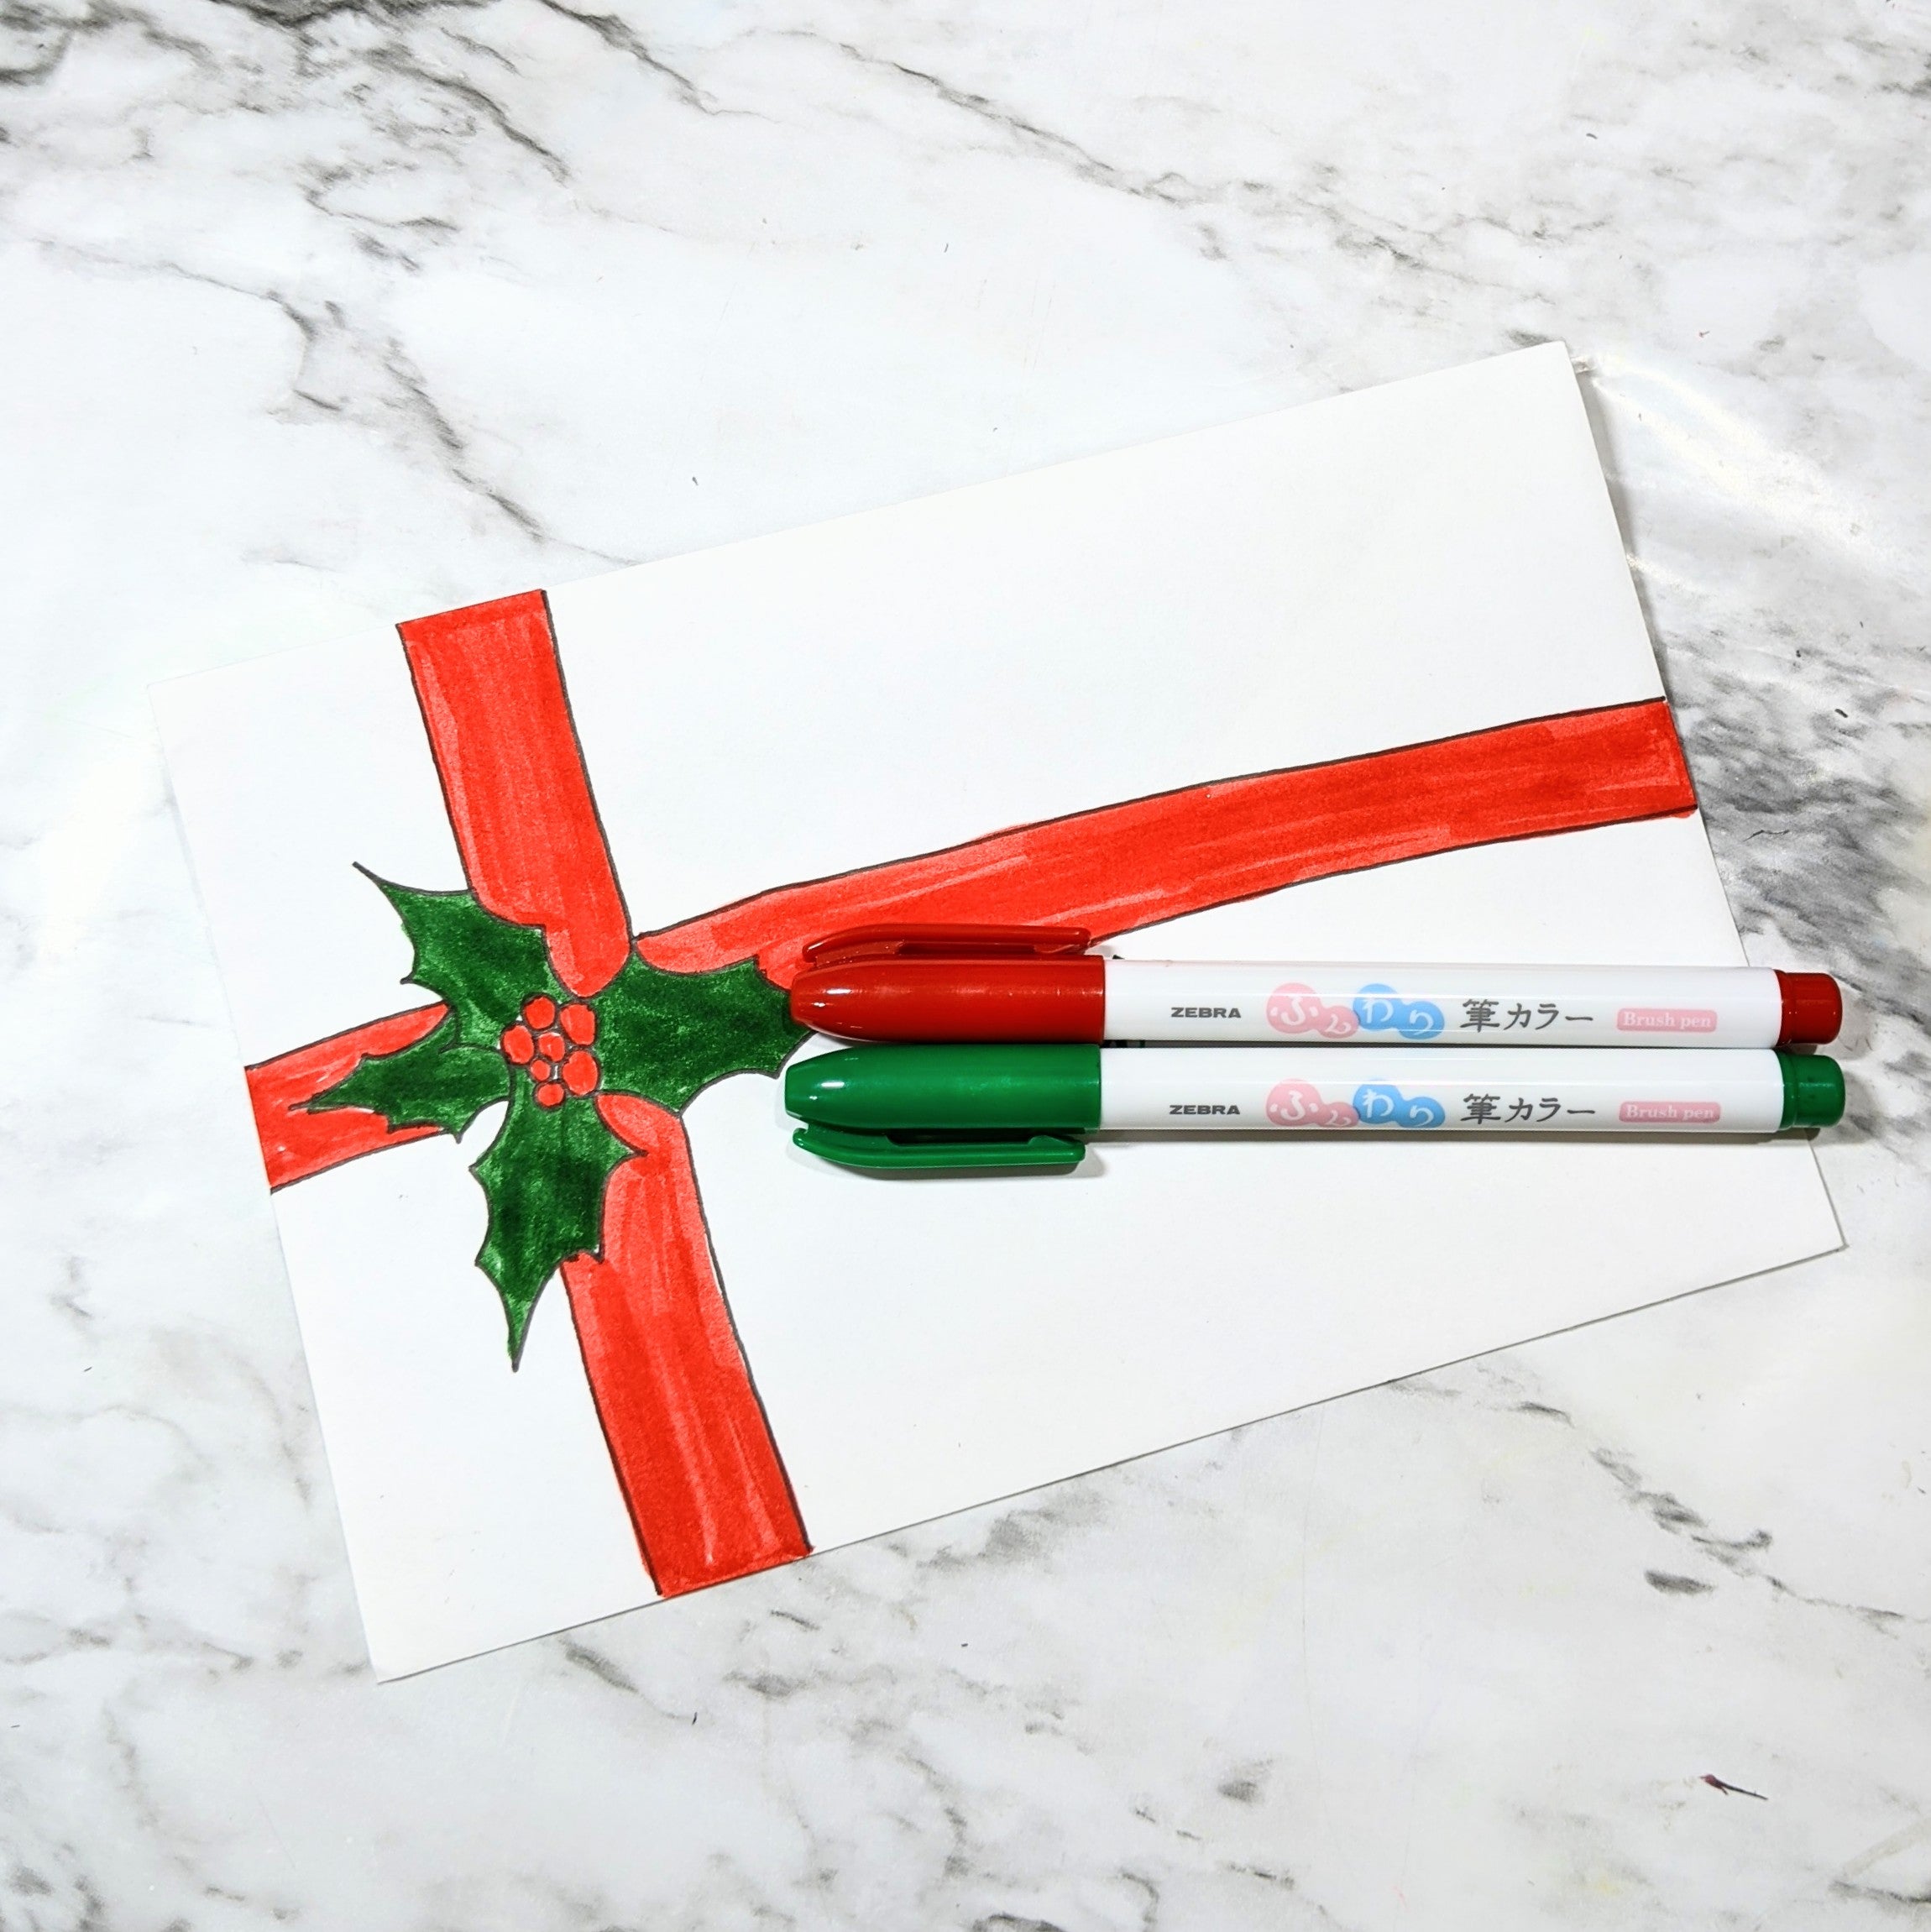
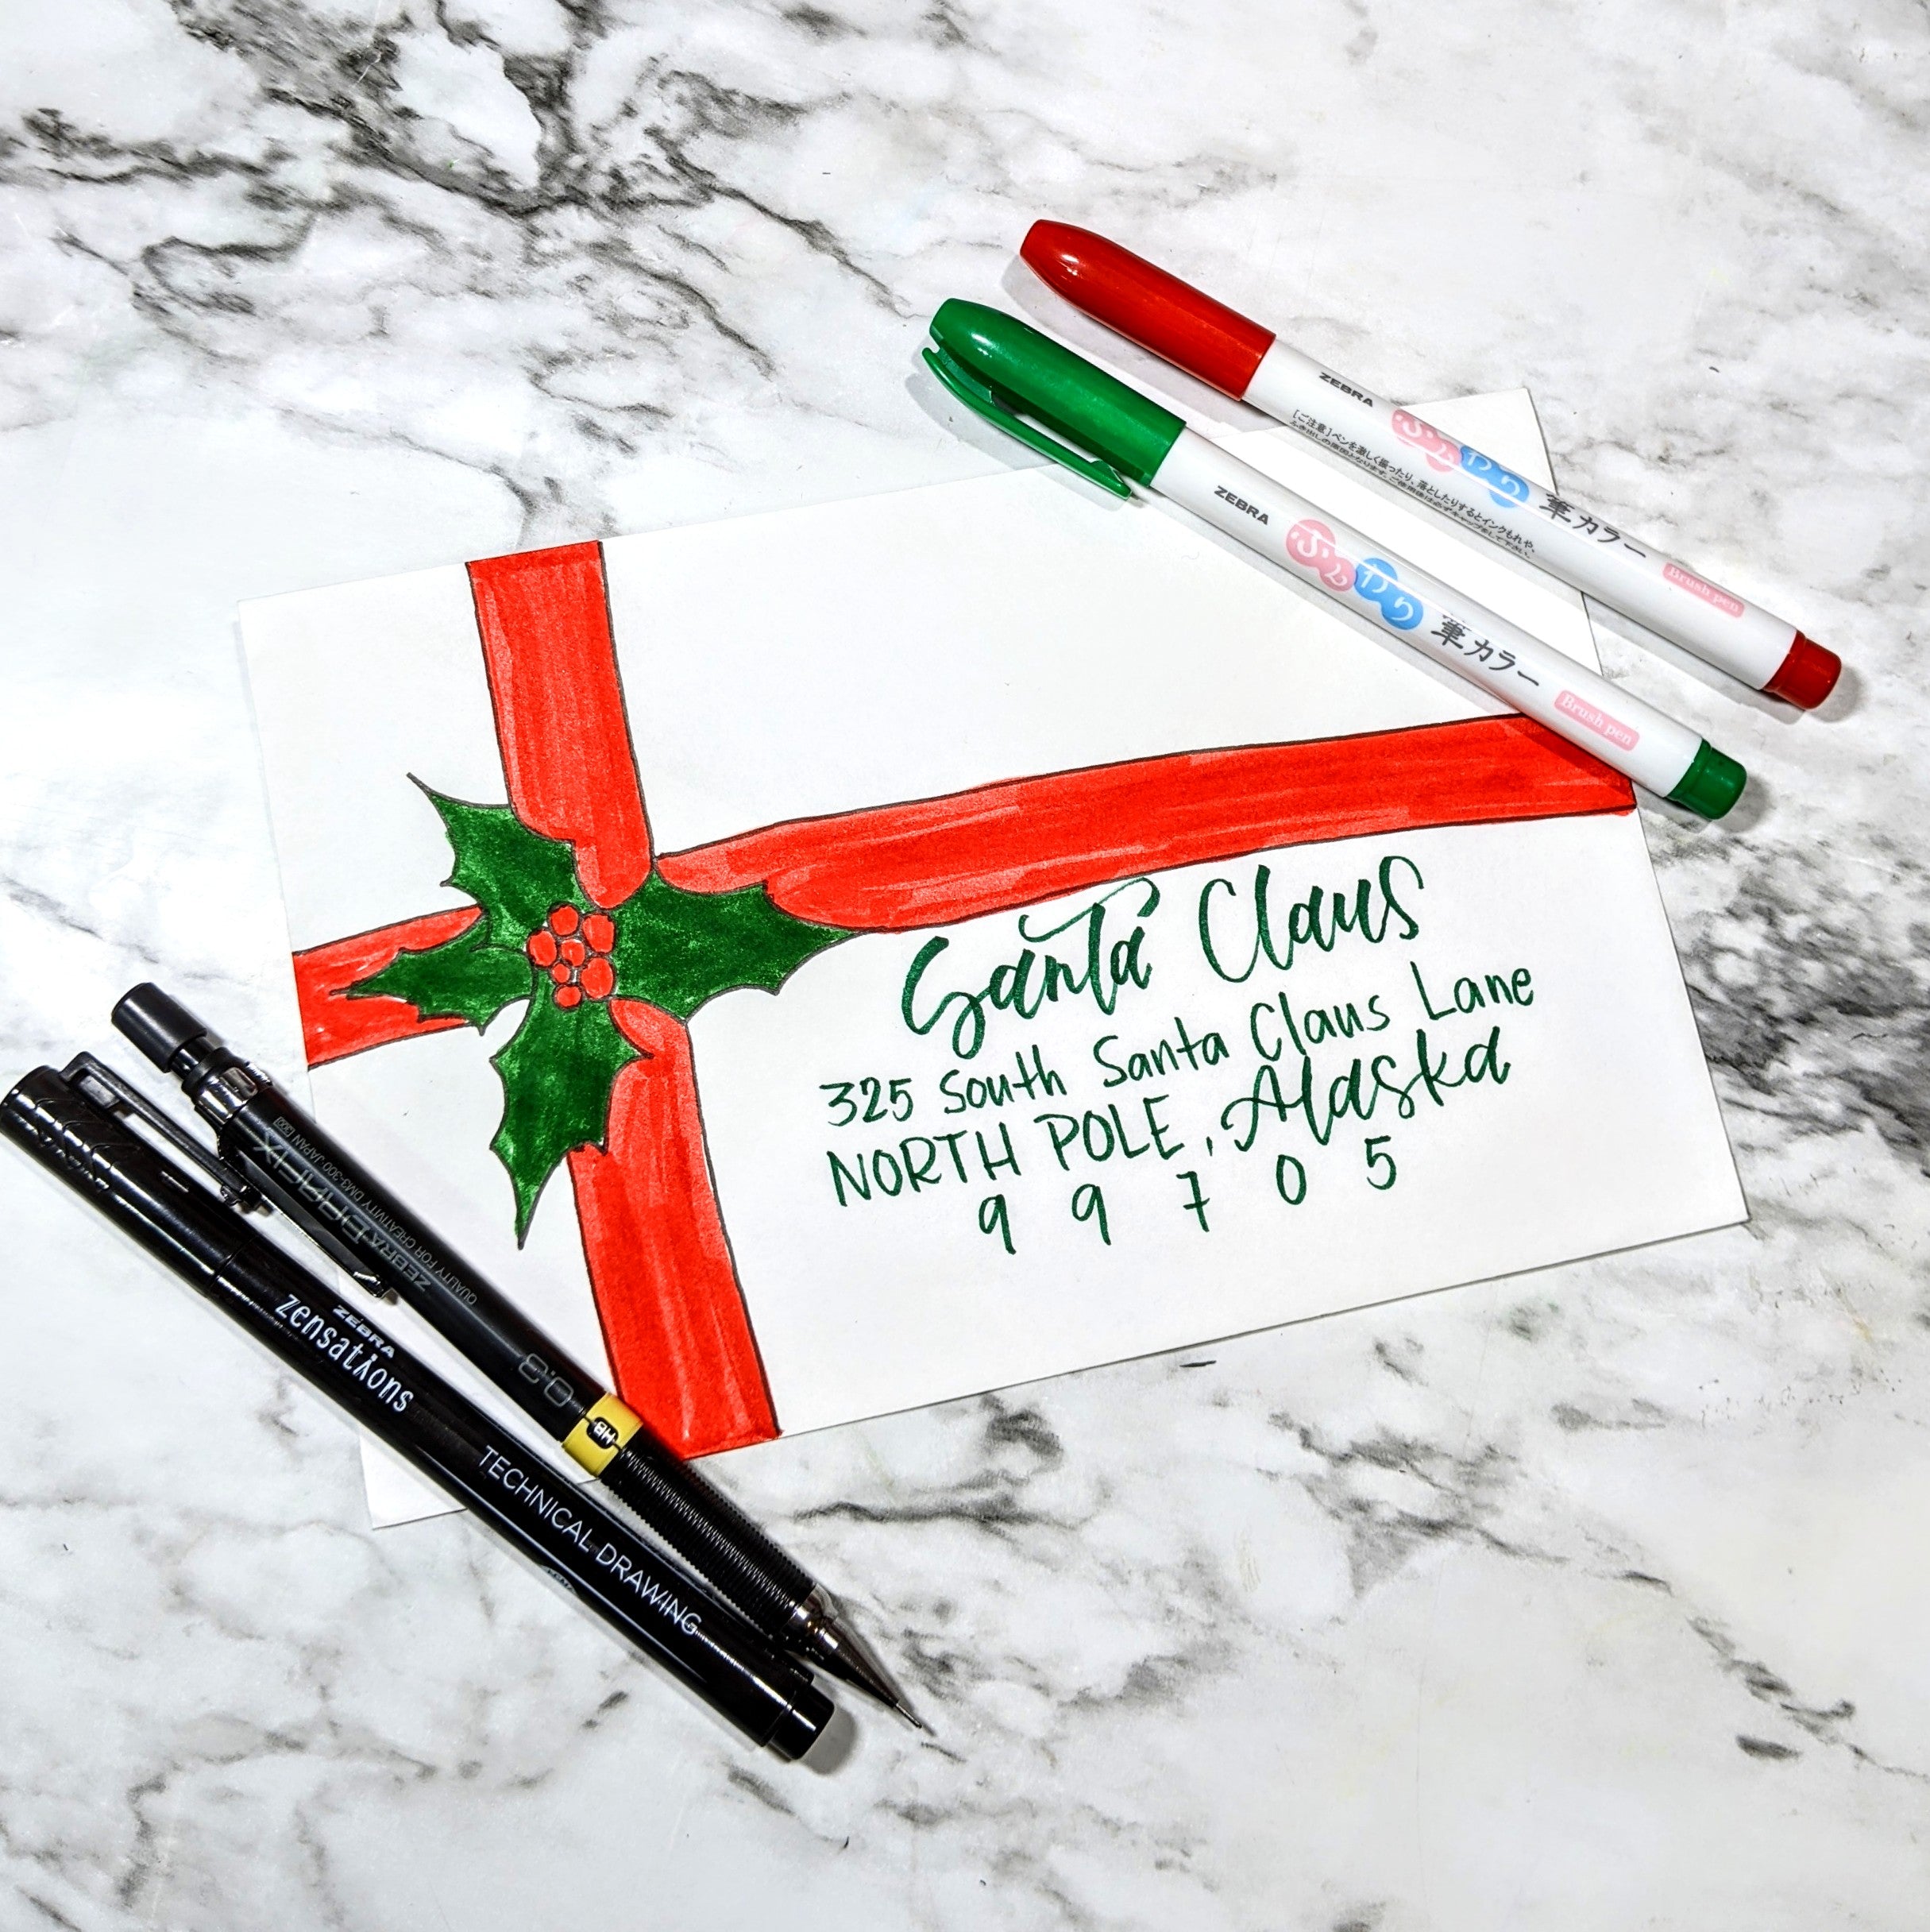
Envelope 3: Christmas Gift (Ribbon and Christmas Botanicals)
2. Then, trace the drawing using the Zensations Technical Drawing Pen.
3. Color the ribbon, leaves, and berries using the Funwari Brush Pens.
4. Then, write the recipient’s name and mailing address using the Funwari Brush Pen in Green.
5. The Funwari Brush Pens are perfect for this project because the brush tip pens are so easy to use for coloring.
And there you have it! I hope this gives you some inspiration for your own holiday envelope designs. To see more of my work, head over to @anjcreativeletters on Instagram. For more holiday art tutorials, check out How to Create Holiday Recipe Art.


 2. Trace your pencil sketch with the Zensations Technical Drawing Pen. This comes in six different point sizes. I used the 0.8 mm size tip for this project.
 3. Let’s add the lights! Using the Kirarich Glitter Highlighters, simply add in some little circles on alternate sides of the line you traced with different colors, mimicking Christmas lights. Make sure you fill in the circles with solid color.
 4. Then, hand-letter the name and mailing address of your card recipient using the Funwari Brush Pen. I used the vibrant red color to give it a festive feel.
Tips for adding creative flair to the mailing address:
4. Then, hand-letter the name and mailing address of your card recipient using the Funwari Brush Pen. I used the vibrant red color to give it a festive feel.
Tips for adding creative flair to the mailing address:


 2. With the ClickArt Retractable Marker Pen in Black, draw some leaves and different size circles and leaf shapes around the circle.
 3. Next, color the leaves and the circles with the ClickArt Pens: Green for leaves and red for the berries.
 4. Then, add the card recipient’s name and mailing address in the middle of the wreath using the ClickArt Pen in Black.
 The ClickArt Retractable Pens are perfect for this project because of the felt tip. They are easy to use especially when coloring the leaves and the circles. The capless design makes it easy to quickly switch between colors, too.


 2. Then, trace the drawing using the Zensations Technical Drawing Pen.
 3. Color the ribbon, leaves, and berries using the Funwari Brush Pens.
 4. Then, write the recipient’s name and mailing address using the Funwari Brush Pen in Green.
 5. The Funwari Brush Pens are perfect for this project because the brush tip pens are so easy to use for coloring.
 And there you have it! I hope this gives you some inspiration for your own holiday envelope designs. To see more of my work, head over to @anjcreativeletters on Instagram. For more holiday art tutorials, check out How to Create Holiday Recipe Art.