
Hi there! It’s Christine Asciutto of @twinkleplansherday. Today, I am going to show you how to make three colorful, custom birthdays cards in under 20 minutes. These cards are simple to make and are great to have on hand for any last-minute birthday parties that pop up!
Materials Needed
- Paper trimmer
- DelGuard Mechanical Pencil
- Mildliner Brush Pens
- Mildliner Highlighters
- ClickArt Retractable Marker Pen
- Blank white paper or cardstock (5x7) folded in half
- Washi Tape
- Four double-sided pop-up dots
Birthday Card #1

Step 1: Draw Colored Candles
To begin, select five colors of the Mildliner Highlighter for your card. Working from the bottom of your folded cardstock or paper, draw multiple lines in varying lengths to give the illusion of different sized candles. Each candle is made up of two lines using the chiseled tip end of the Mildliner Highlighter.
Step 2: Add Flames to the Candles
Top each candle with a flame using the brush side of a yellow Mildliner Brush Pen. Lay the brush tip gently on its side to create the teardrop effect. 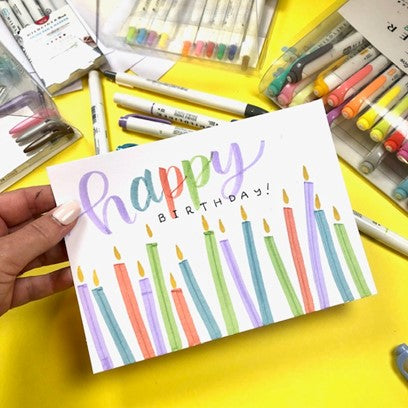
Step 3: Add A Birthday Greeting in Calligraphy
Using multiple colors of the Mildliner Brush Pen, letter the word “HAPPY” in script on the top of the card, alternating colors for each letter.
Then, using the ClickArt Retractable Marker Pen in Black, write the word “BIRTHDAY” in all capital letters.
Birthday Card #2

Step 1: Create Long Ovals
Start by selecting five Mildliner Brush Pen colors for your card’s color scheme. Then, create five long ovals, using a different color for each one.
Step 2: Add Block Lettering and Calligraphy
Next, write out the word “HAPPY,” placing each letter in a different colored oval using a block font. Then trace over it, using your ClickArt Retractable Marker in Black. In script lettering, use the same ClickArt Retractable Marker in Black to write the word “birthday.”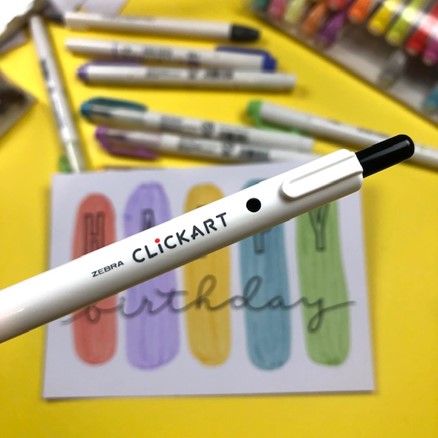
Birthday Card #3

Step 1: Cut and Trace A Square
Cut or punch out a 2-inch square and place diagonally in the upper center of a folded 5x7 card. Then, using your DelGuard Mechanical Pencil, trace around the square (shown above) and set it aside.
Step 2: Draw and Color Parallel Lines
Extend the lines of the square using a ruler and the DelGuard Mechanical Pencil. In 5mm increments, draw parallel lines.
Fill in every other line using various colors of your Mildliner Highlighter with the chisel tip.
Use washi tape to keep lines crisp across the borders. Erase all pencil marks.
*Note that the chiseled tips of Mildliner Highlighters are just under 5mm.
Step 3: Embellish the Square Cutout
Take the 2-inch square cutout and sketch the word, “YAY” on it with the DelGuard Mechanical Pencil. Then, using the fine tip of any Mildliner Highlighter of your choosing, trace over “YAY.”
Next, outline the square. Using a different color Mildliner Highlighter, highlight each letter by outlining the right side of each stroke. Add another line around the border.
Step 4: Add Dimension to the Card
To add dimension to your card, place four double-sided pop-up dots along each corner of the square and then place on the card.
I hope you enjoyed learning an exciting, customized way to create birthday cards! These cards are a great way to celebrate someone’s day. For more custom card inspiration, check out my other tutorial: How to Create a Colorful Floral Mother’s Day Card.