How to Create a Mind Map and Brain Dump in Your Bullet Journal
Hi everyone! Cynthia from @cynthiabujo here. Today I’m going to show you how to create a brain dump and mind map for your bullet journal. These spreads are perfect for organizing different aspects of your life and can be customized to fit your individual needs.
A mind map is an extremely versatile way to organize ideas, whether it be goals for the month, brainstorming ideas you have for a project, or simply to organize your thoughts. Now, let’s jump into the tutorial to make your own mind map.
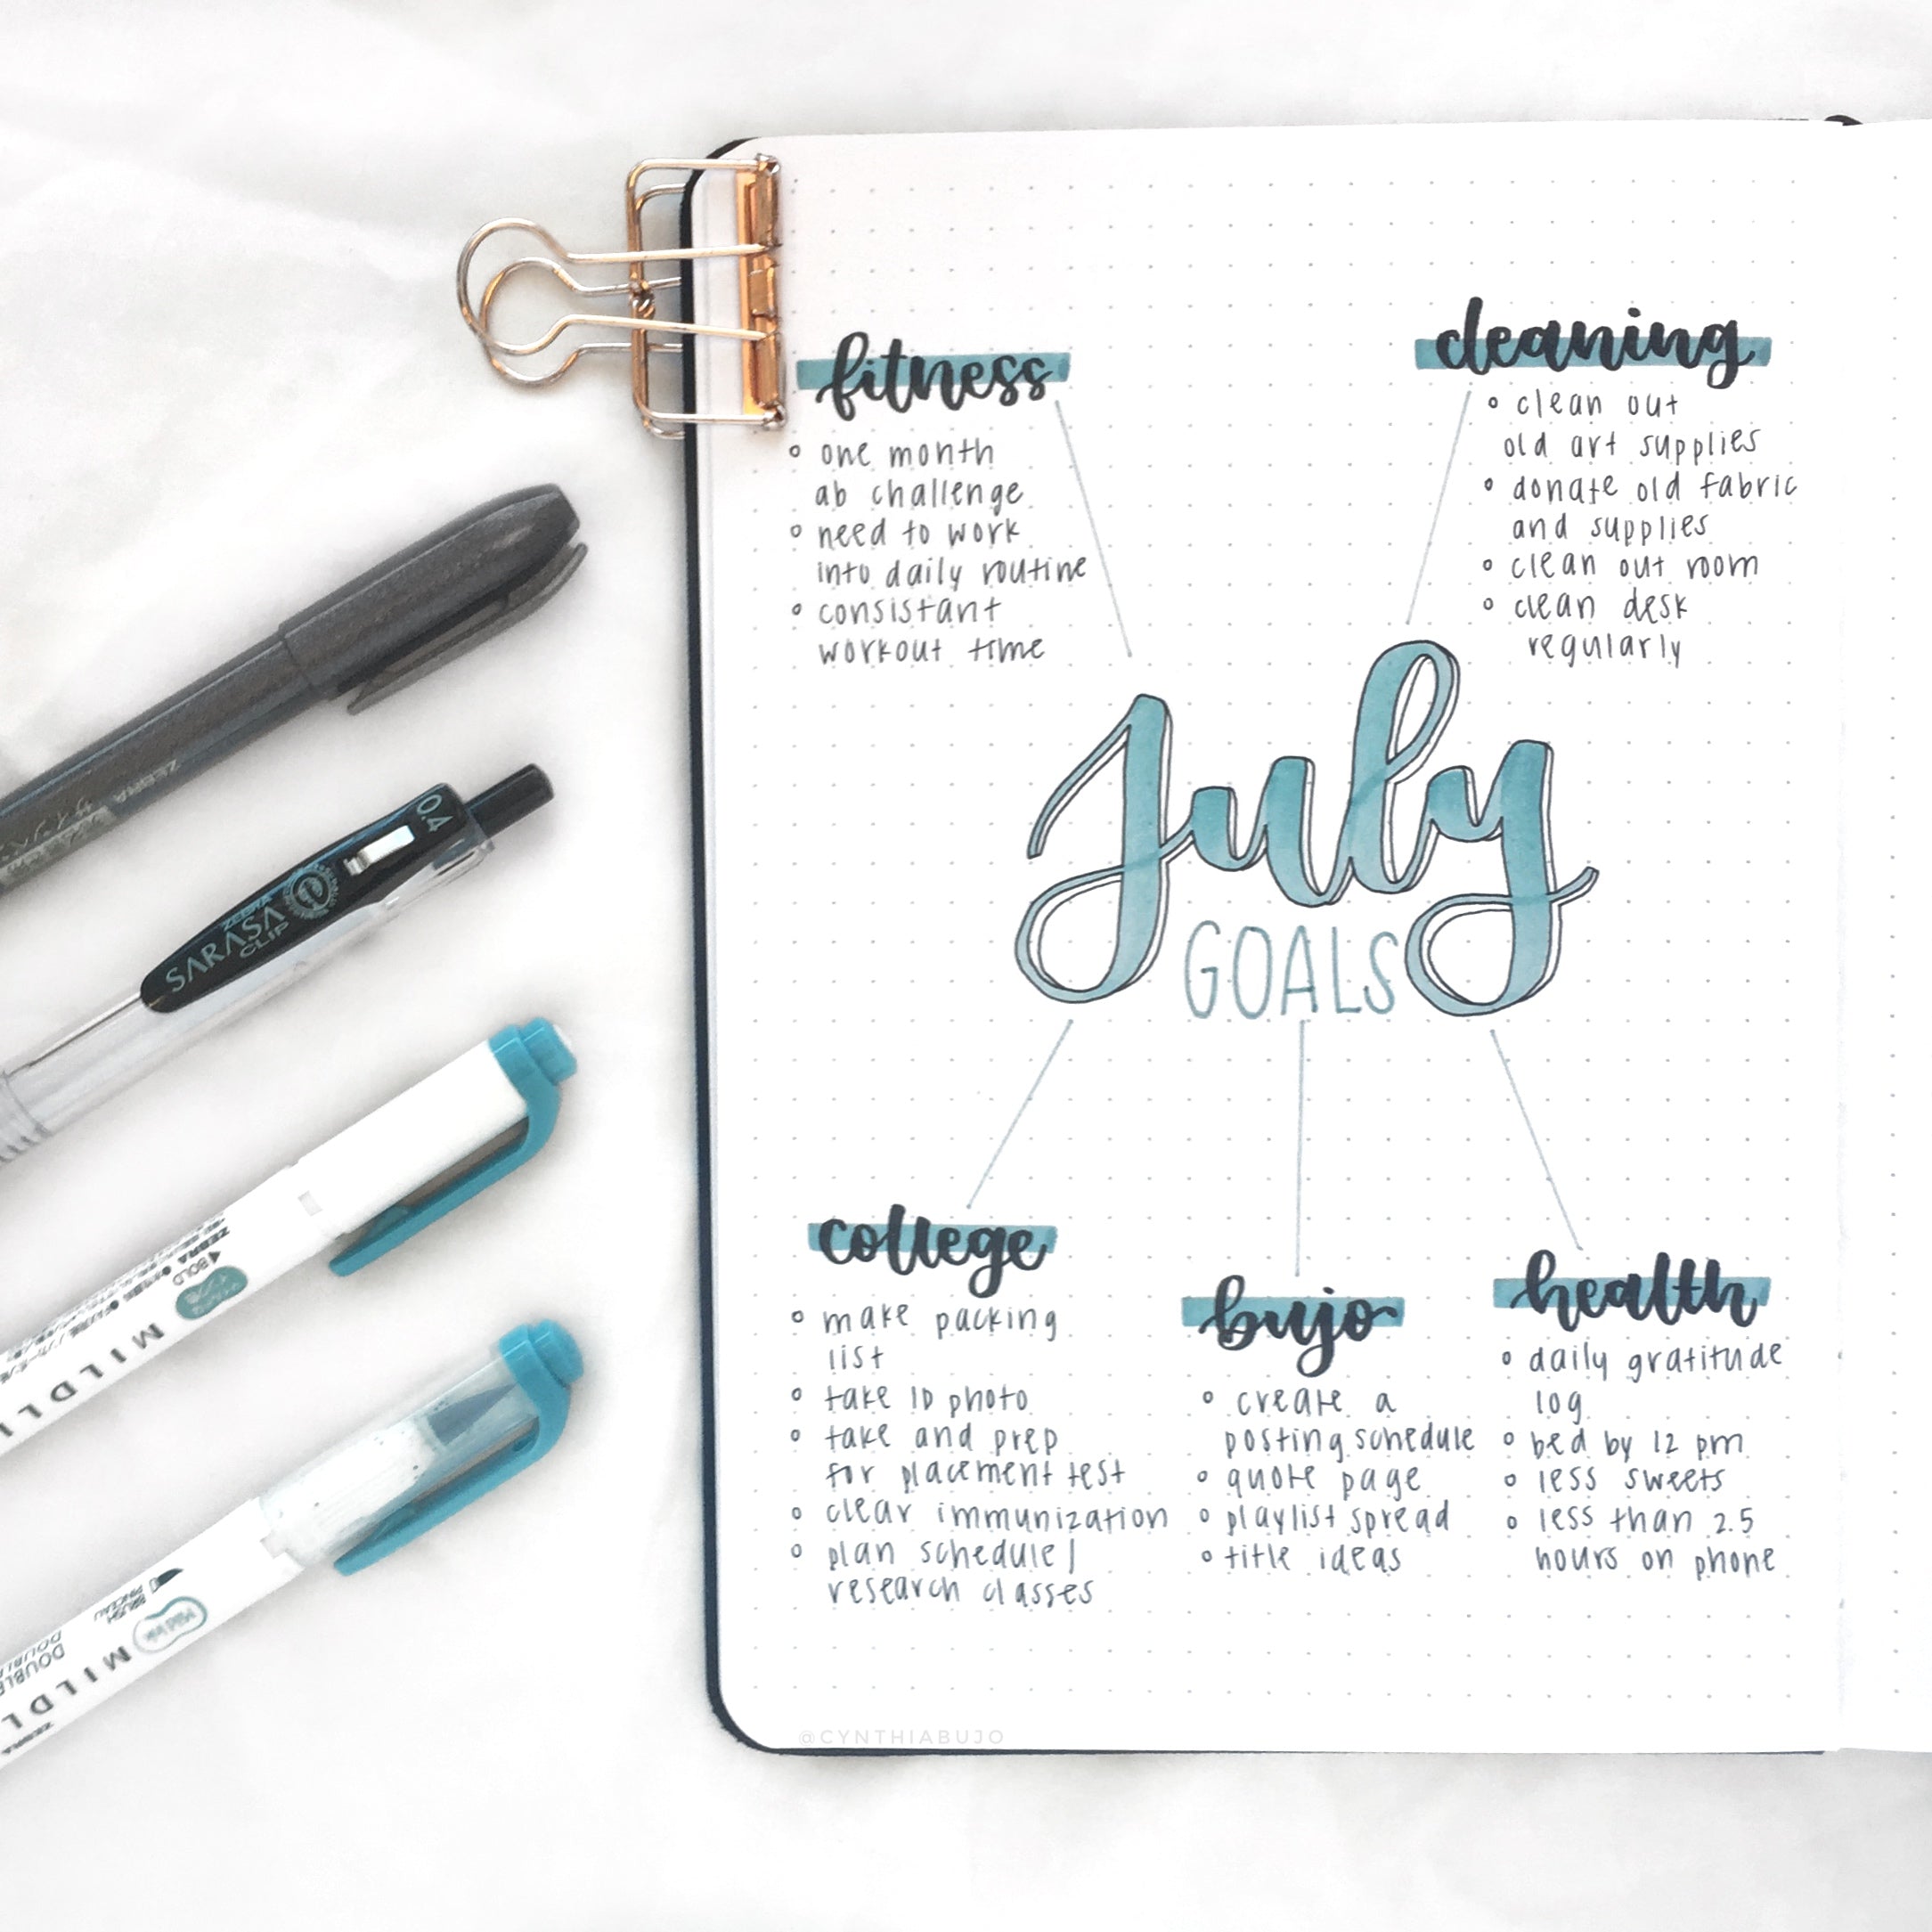
Mind Map Tutorial
Step 1: Hand letter the topic of your mind map
Using my Mildliner Brush Pen, I first lettered the topic—I chose July Goals—in the center of the page. I absolutely love these Mildliner Brush Pens because of how flexible the tip is, which makes it super easy to control. These brush pens also have a bullet tip on the opposite end which can be used for faux calligraphy, or for drawing thin lines. Here, I’m using the bullet tip to write “goals.”
Step 2: Add in your categories
For this mind map, I chose several overarching categories and lettered them using my Zensations Brush Pen, which is perfect for small titles. The brush tip is extremely flexible so it’s super easy to get those thick downstrokes and thin upstrokes.
After I lettered the categories, I used Mildliner Highlighters to highlight the titles. I love how the Mildliner Highlighter colors match the Mildliner Brush Pen colors, so of course I had to coordinate the colors!
Worldwide, the Sarasa Clip Gel Retractable Pen is available in many different point sizes. In the U.S., it is available in a 0.5mm point size in Standard and Milky colors, and 1.0mm in Shiny Colors.
Step 3: Fill in your mind map and add details
Using my Sarasa Clip Gel Retractable Pen, I broke down my categories and wrote several individual and focused goals. This gel pen writes so smoothly and doesn’t smear at all! For some extra details, I used my Sarasa Clip Gel Pen once again and added a shadow to the lettering.
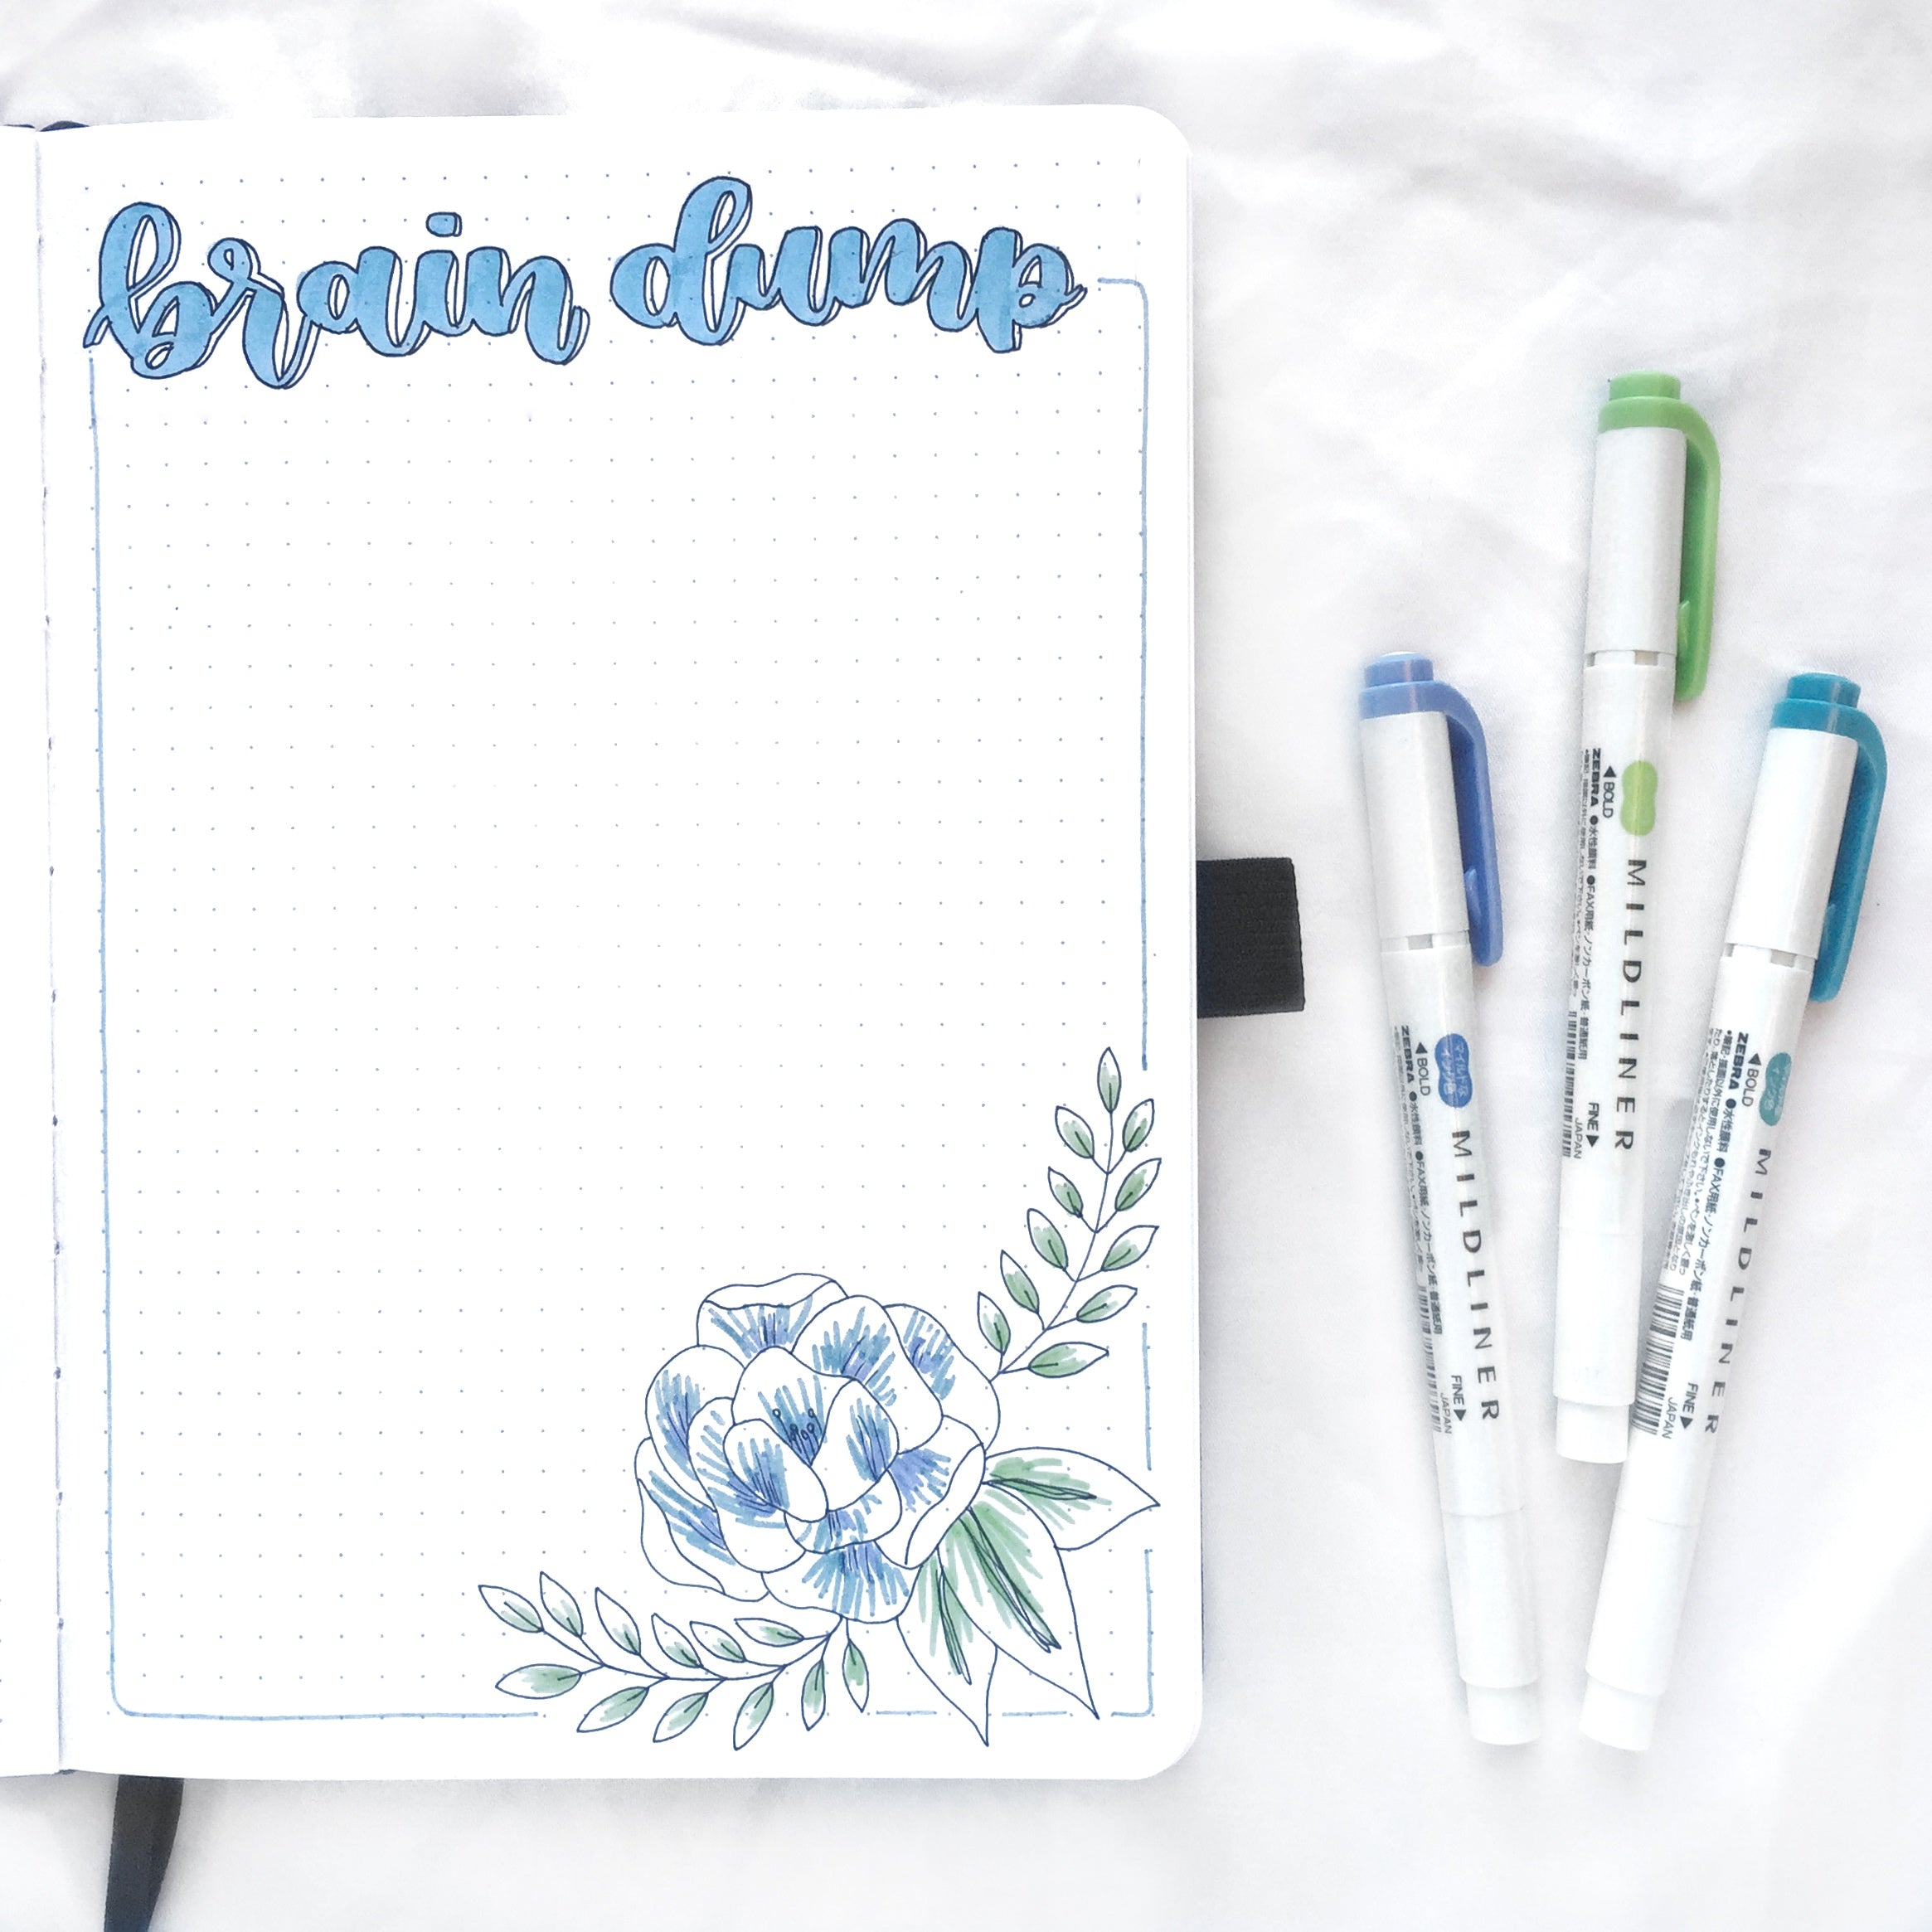
Brain Dump Tutorial
Next, we’ll add a brain dump spread to the next page. I absolutely love brain dumps because of their lack of structure—there’s no right or wrong way to create one. They can be used for anything from organizing ideas, to writing down your thoughts, to brainstorming.
Step 1: Letter the title
I started by lettering “brain dump” at the top of the page using my Mildliner Brush Pen, and added a shadow using my Sarasa Clip Gel Pen like I did for the mind map.
Step 2: Add doodles
A great way to add more interest to the page is to draw embellishments. I decided to draw a flower in the corner of the page using the Sarasa Clip Gel Pen. Using the bullet tip of the Mildliner Highlighters, I colored in the flower to make it stand out a bit more. I absolutely love the variety of colors the Mildliner Highlighters come in. There’s a color for every occasion.


 Worldwide, the Sarasa Clip Gel Retractable Pen is available in many different point sizes. In the U.S., it is available in a 0.5mm point size in Standard and Milky colors, and 1.0mm in Shiny Colors.