Hi there! I’m Courtney from Tulip Poplar Co. and I’m excited to walk you through the steps I take to create easy spring flowers designs! Spring is my favorite season and there are so many beautiful flowers to choose from, but today I will be drawing daffodil and tulip flowers.
I have broken down the process step by step. First, I’ll show you how to create each flower shape using simple steps. Then I’ll walk you through how to create a colorful composition of those flowers using my favorite Zebra Pen products! Let’s get started!
How to Draw A Daffodil
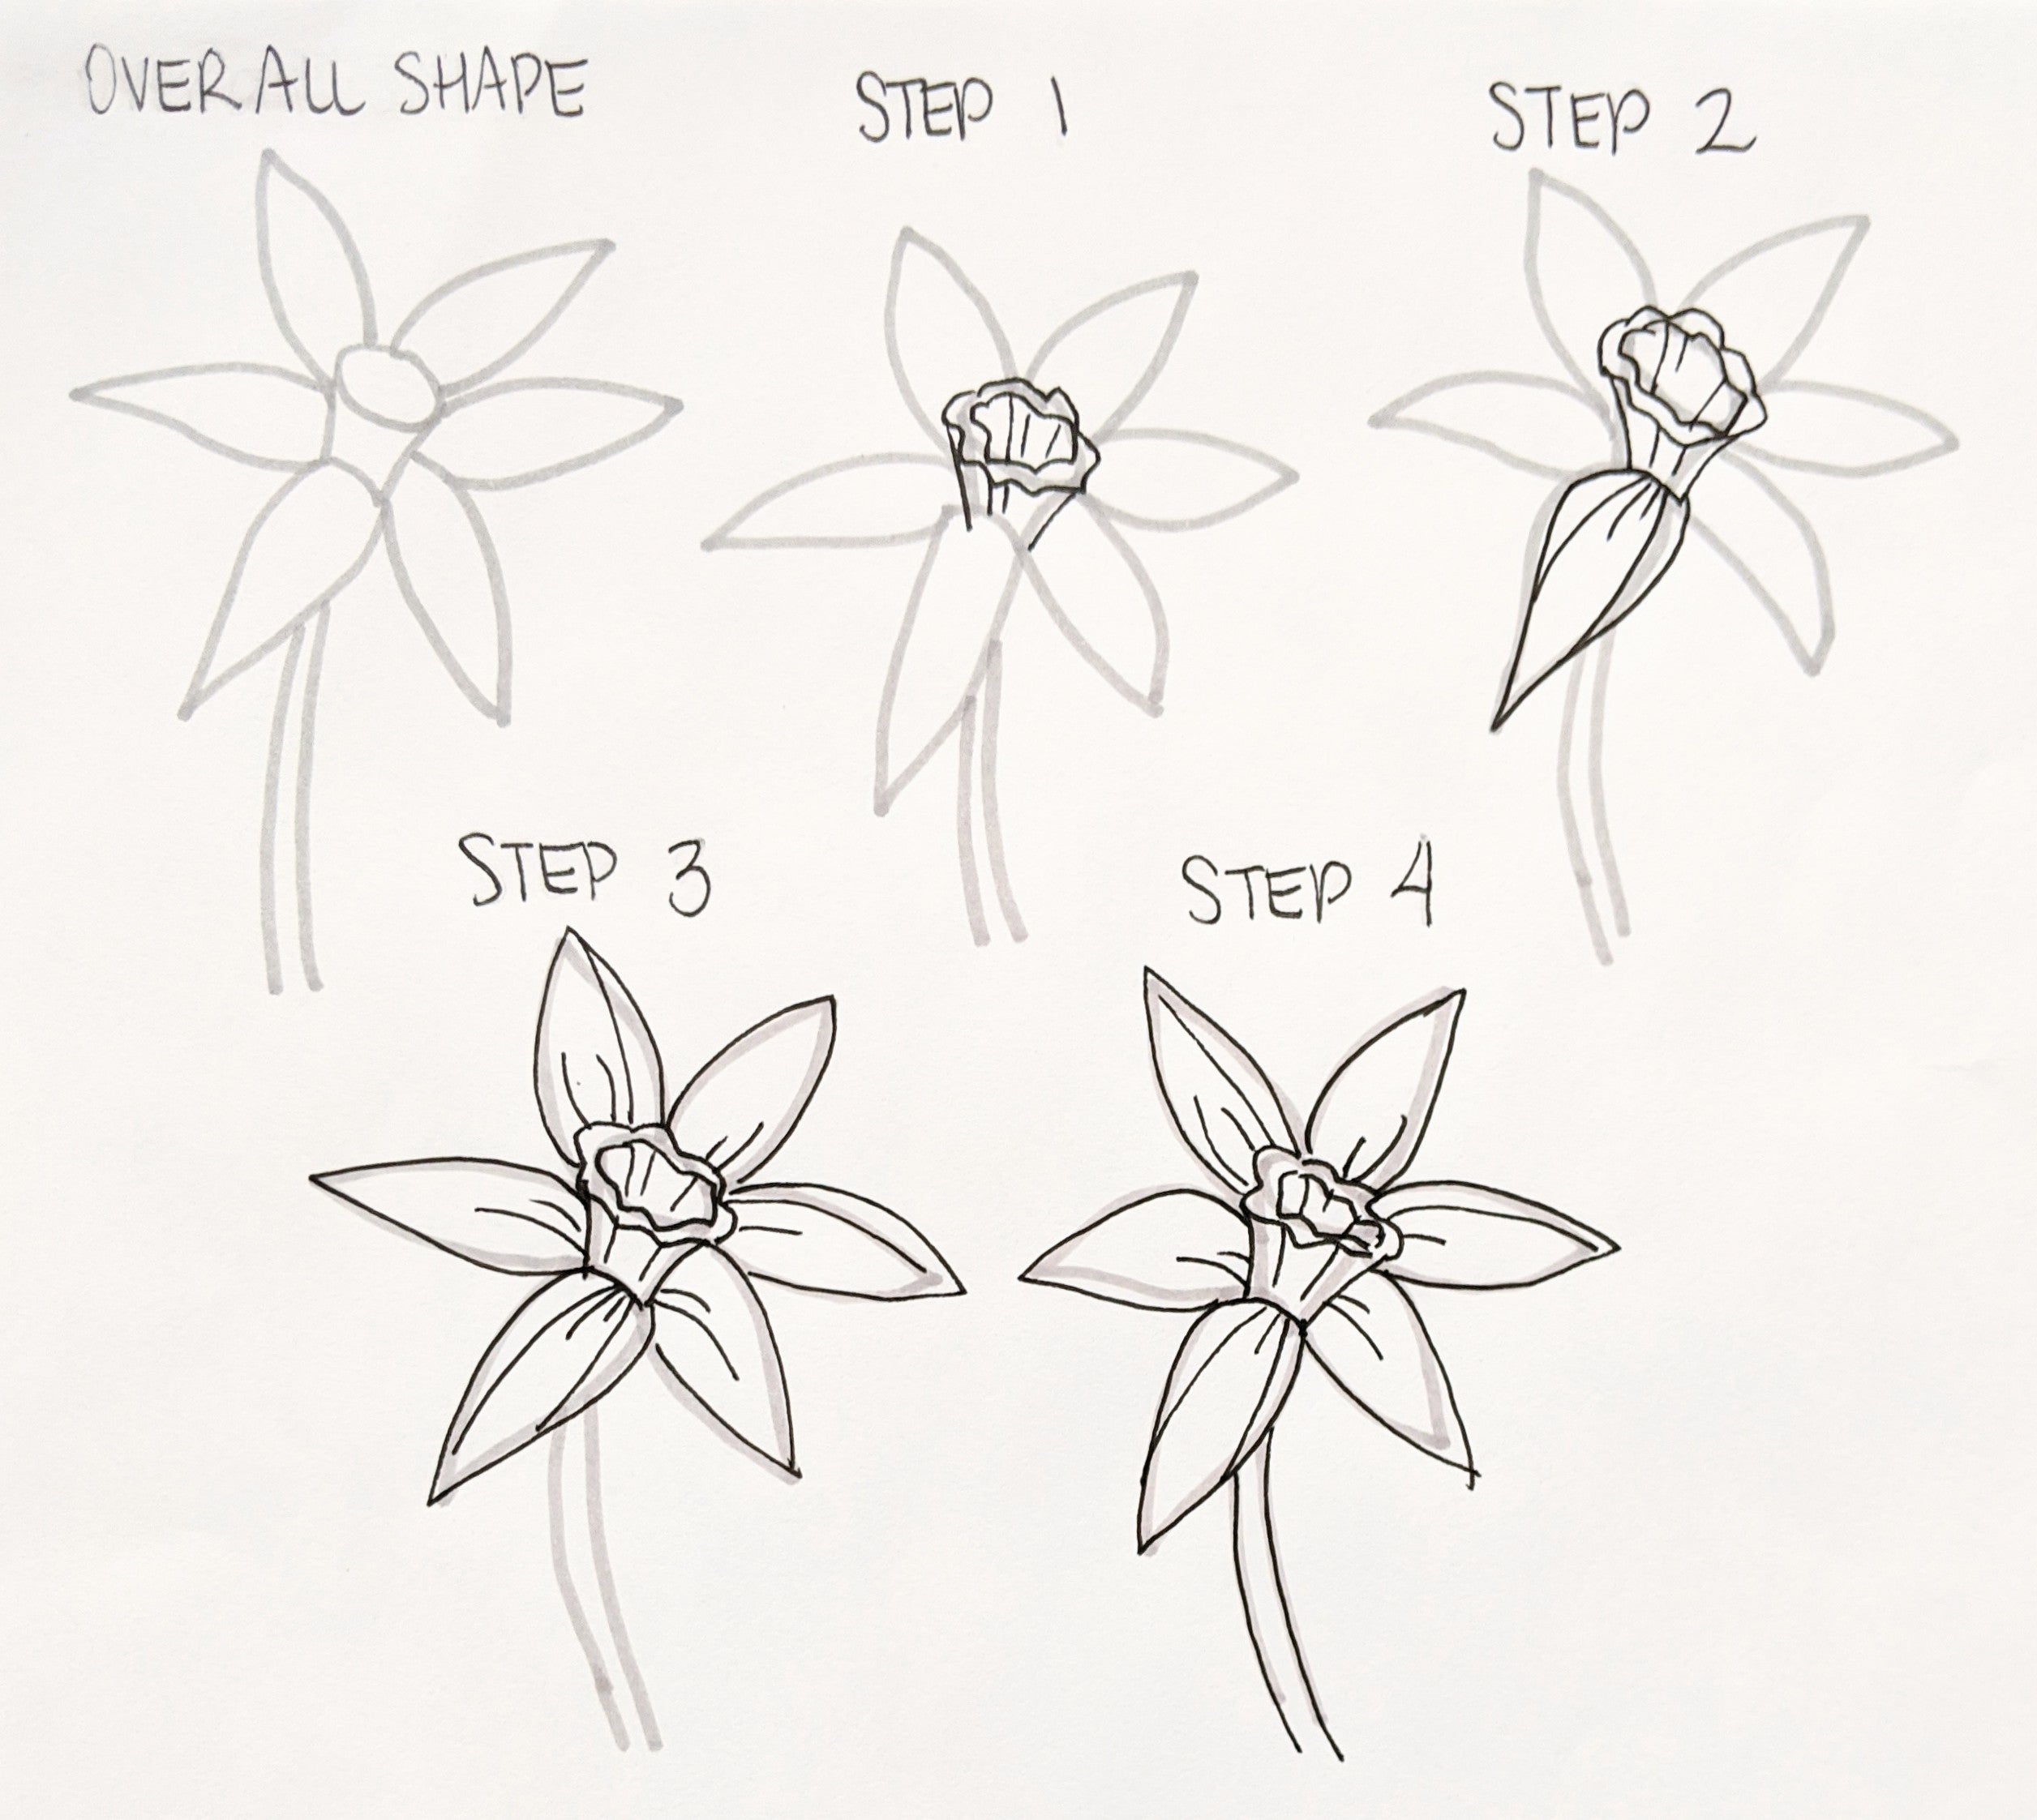
Overall Shape of a Daffodil
Notice that the cup of the flower is shaped like a trumpet. The rim is circular or oval shaped and extends down to meet the petals. Daffodils are wonderful because there are many slight variations. Some petals are fat and some thin, but they are teardrop in shape.
Step 1: Add Center Details
I like to make the rim have the frilly appearance of a classic daffodil by making a squiggly circle surrounded by a second squiggly circle (see picture above). The rim is thin, so make sure to space the circles far apart. Extend the center down where it will connect with the petals.
Step 2: Draw the Petals
Start on the petals by focusing on that teardrop shape. Daffodils generally have six petals. To give your flower more detail you can add in some curves for line shading. Do this by adding “C” shaped curves following the direction of your main petal lines. Add as many or as few as you like!
Step 3: Continue Adding Petals
Continue until you have finished drawing all the petals.
Step 4: Draw the Stem
Add your stem and you’re done! That was easy peasy!
How to Draw A Tulip
Overall Shape of a Tulip
The overall shape of a tulip is much like an egg. The petals overlap nicely and only create an open cup shape once the tulip has fully bloomed.
Step 1:
Draw the first petal as a thin egg shape.
Step 2:
Without drawing over the first oval, add an additional egg-shaped oval next to the first one.
Step 3:
Connect the two ovals at the top with a curved line.
Step 4:
Add a back petal curving from the line you just created down to the base of the flower.
Step 5:
Add a final back petal on the opposite side and then draw your stem. Finished!
Now that you know how to create the basic shapes for each flower, let’s get started on a composition!
How to Create A Spring Flower Composition
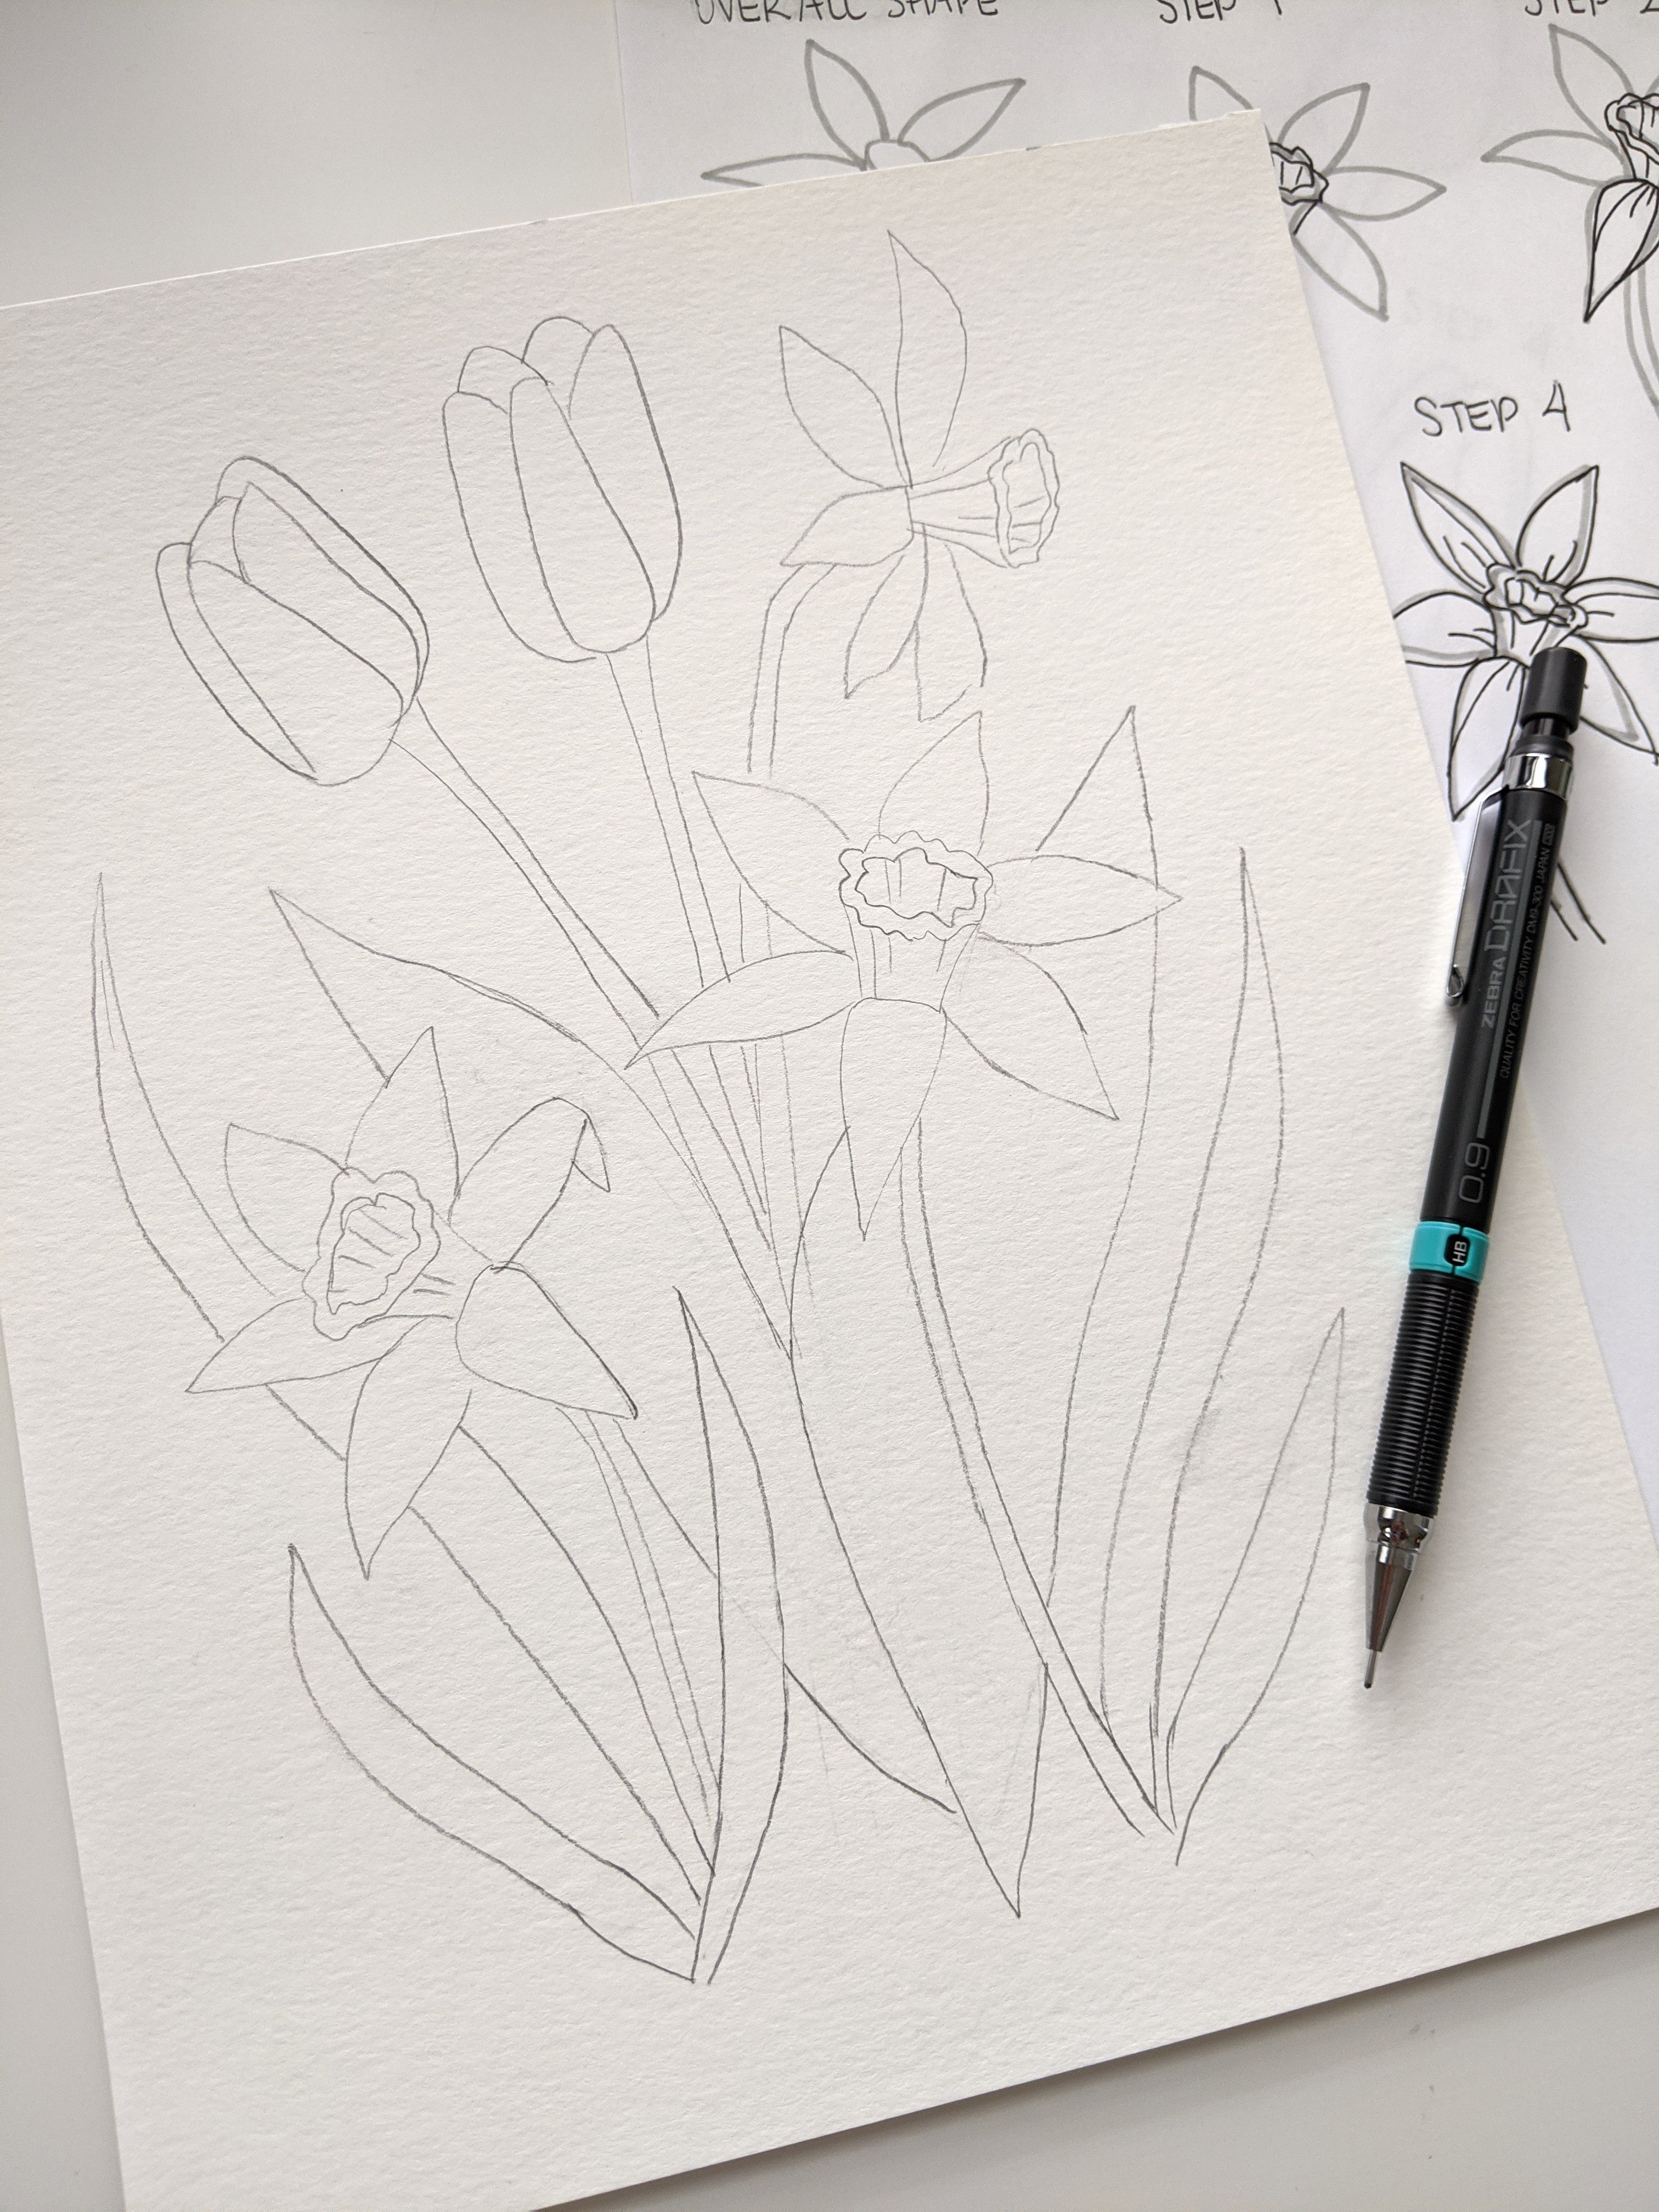
Step 1: Draw Your Composition in Pencil
First, draw your composition using a Zensations Drafix Technical Drawing Pencil. I love these pencils because I find they give me a nice thin, crisp line that can easily be erased later. The goal is to go over the lines with pen later, but if you feel confident enough to skip to that step without first drawing in pencil, go for it! As far as composition, I like to include a few of each flower and anchor them together by incorporating simple leaves. I find that an odd number of flowers (three or five) looks best!
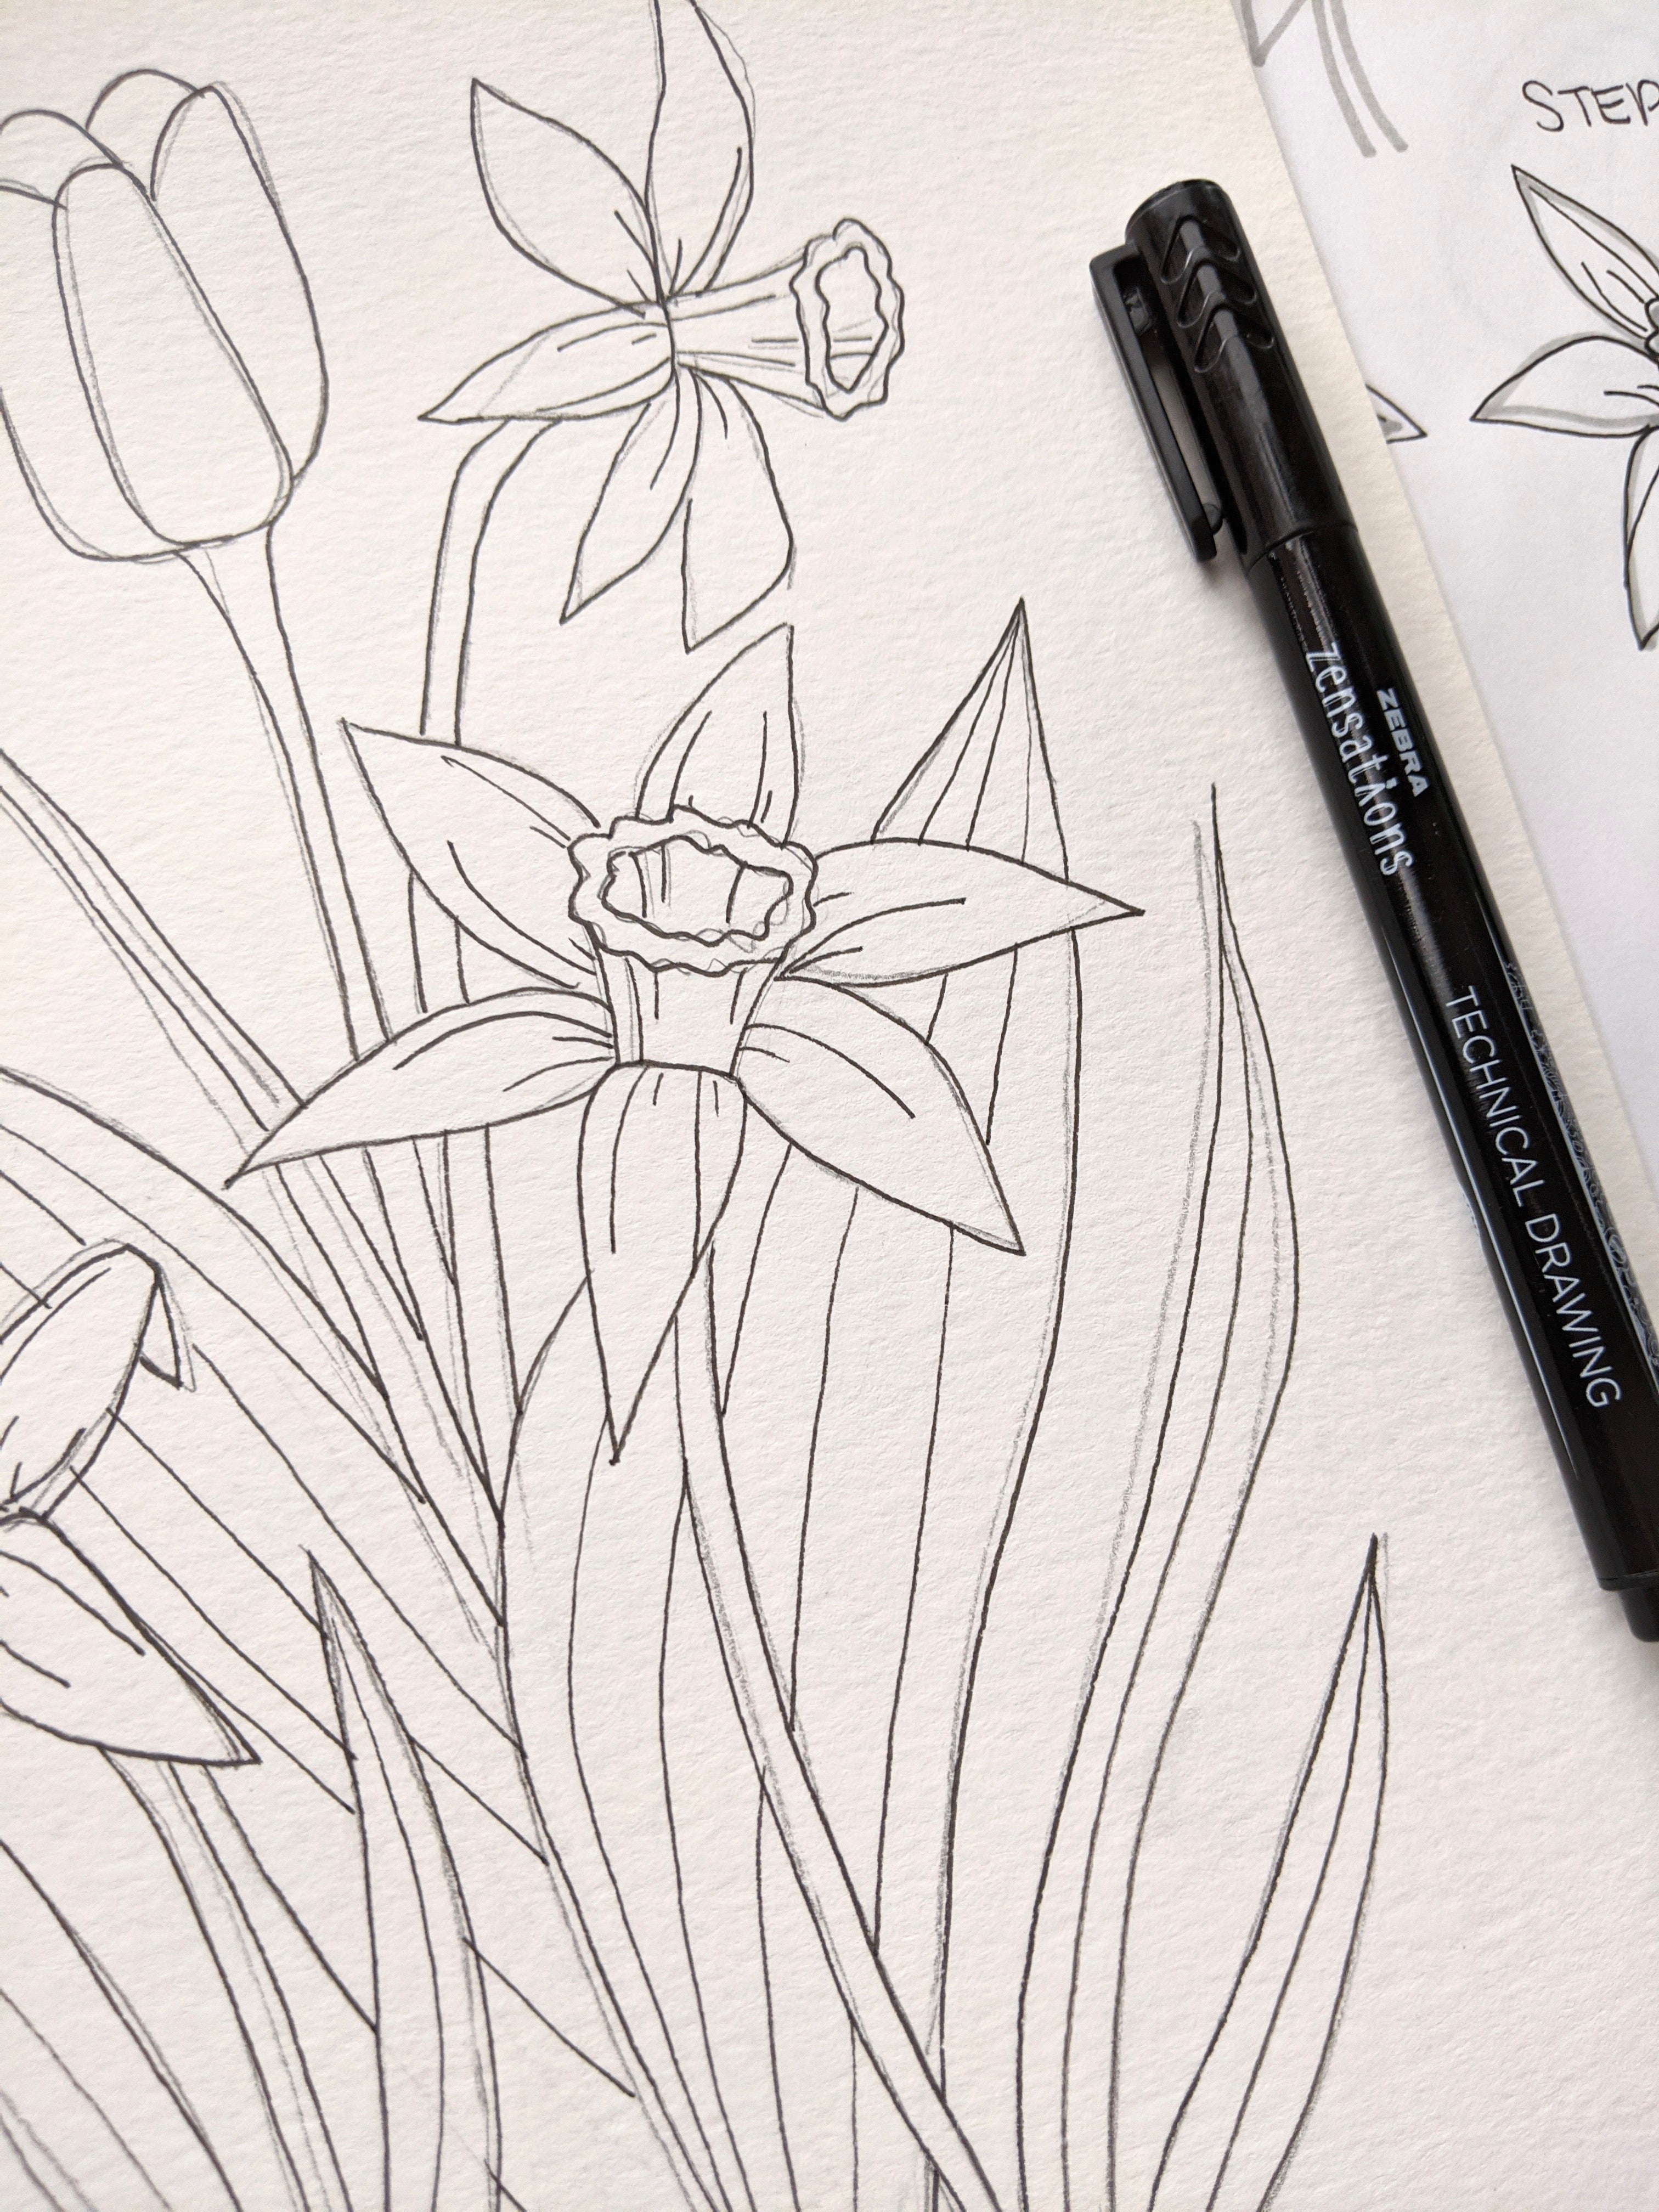
Step 2: Outline Your Composition
Next, let’s make that drawing permanent by going over it with a Zensations Technical Drawing Pen. These pens are my absolute favorite! They provide a waterproof ink that will NOT smudge when you color in the drawing later! Also, they come in a variety of point sizes, so you can pick how thin you want your lines. I am using a 0.5 for this drawing. Don’t worry too much if your lines aren’t perfect. We will be erasing the pencil afterwards so no one will know.
Step 3: Erase the Pencil Lines
Erase the Zensations Technical Drawing Pencil lines and appreciate that beautiful ink drawing you have left! Make sure you erase all of the pencil marks so your colors won’t smudge in our next step.
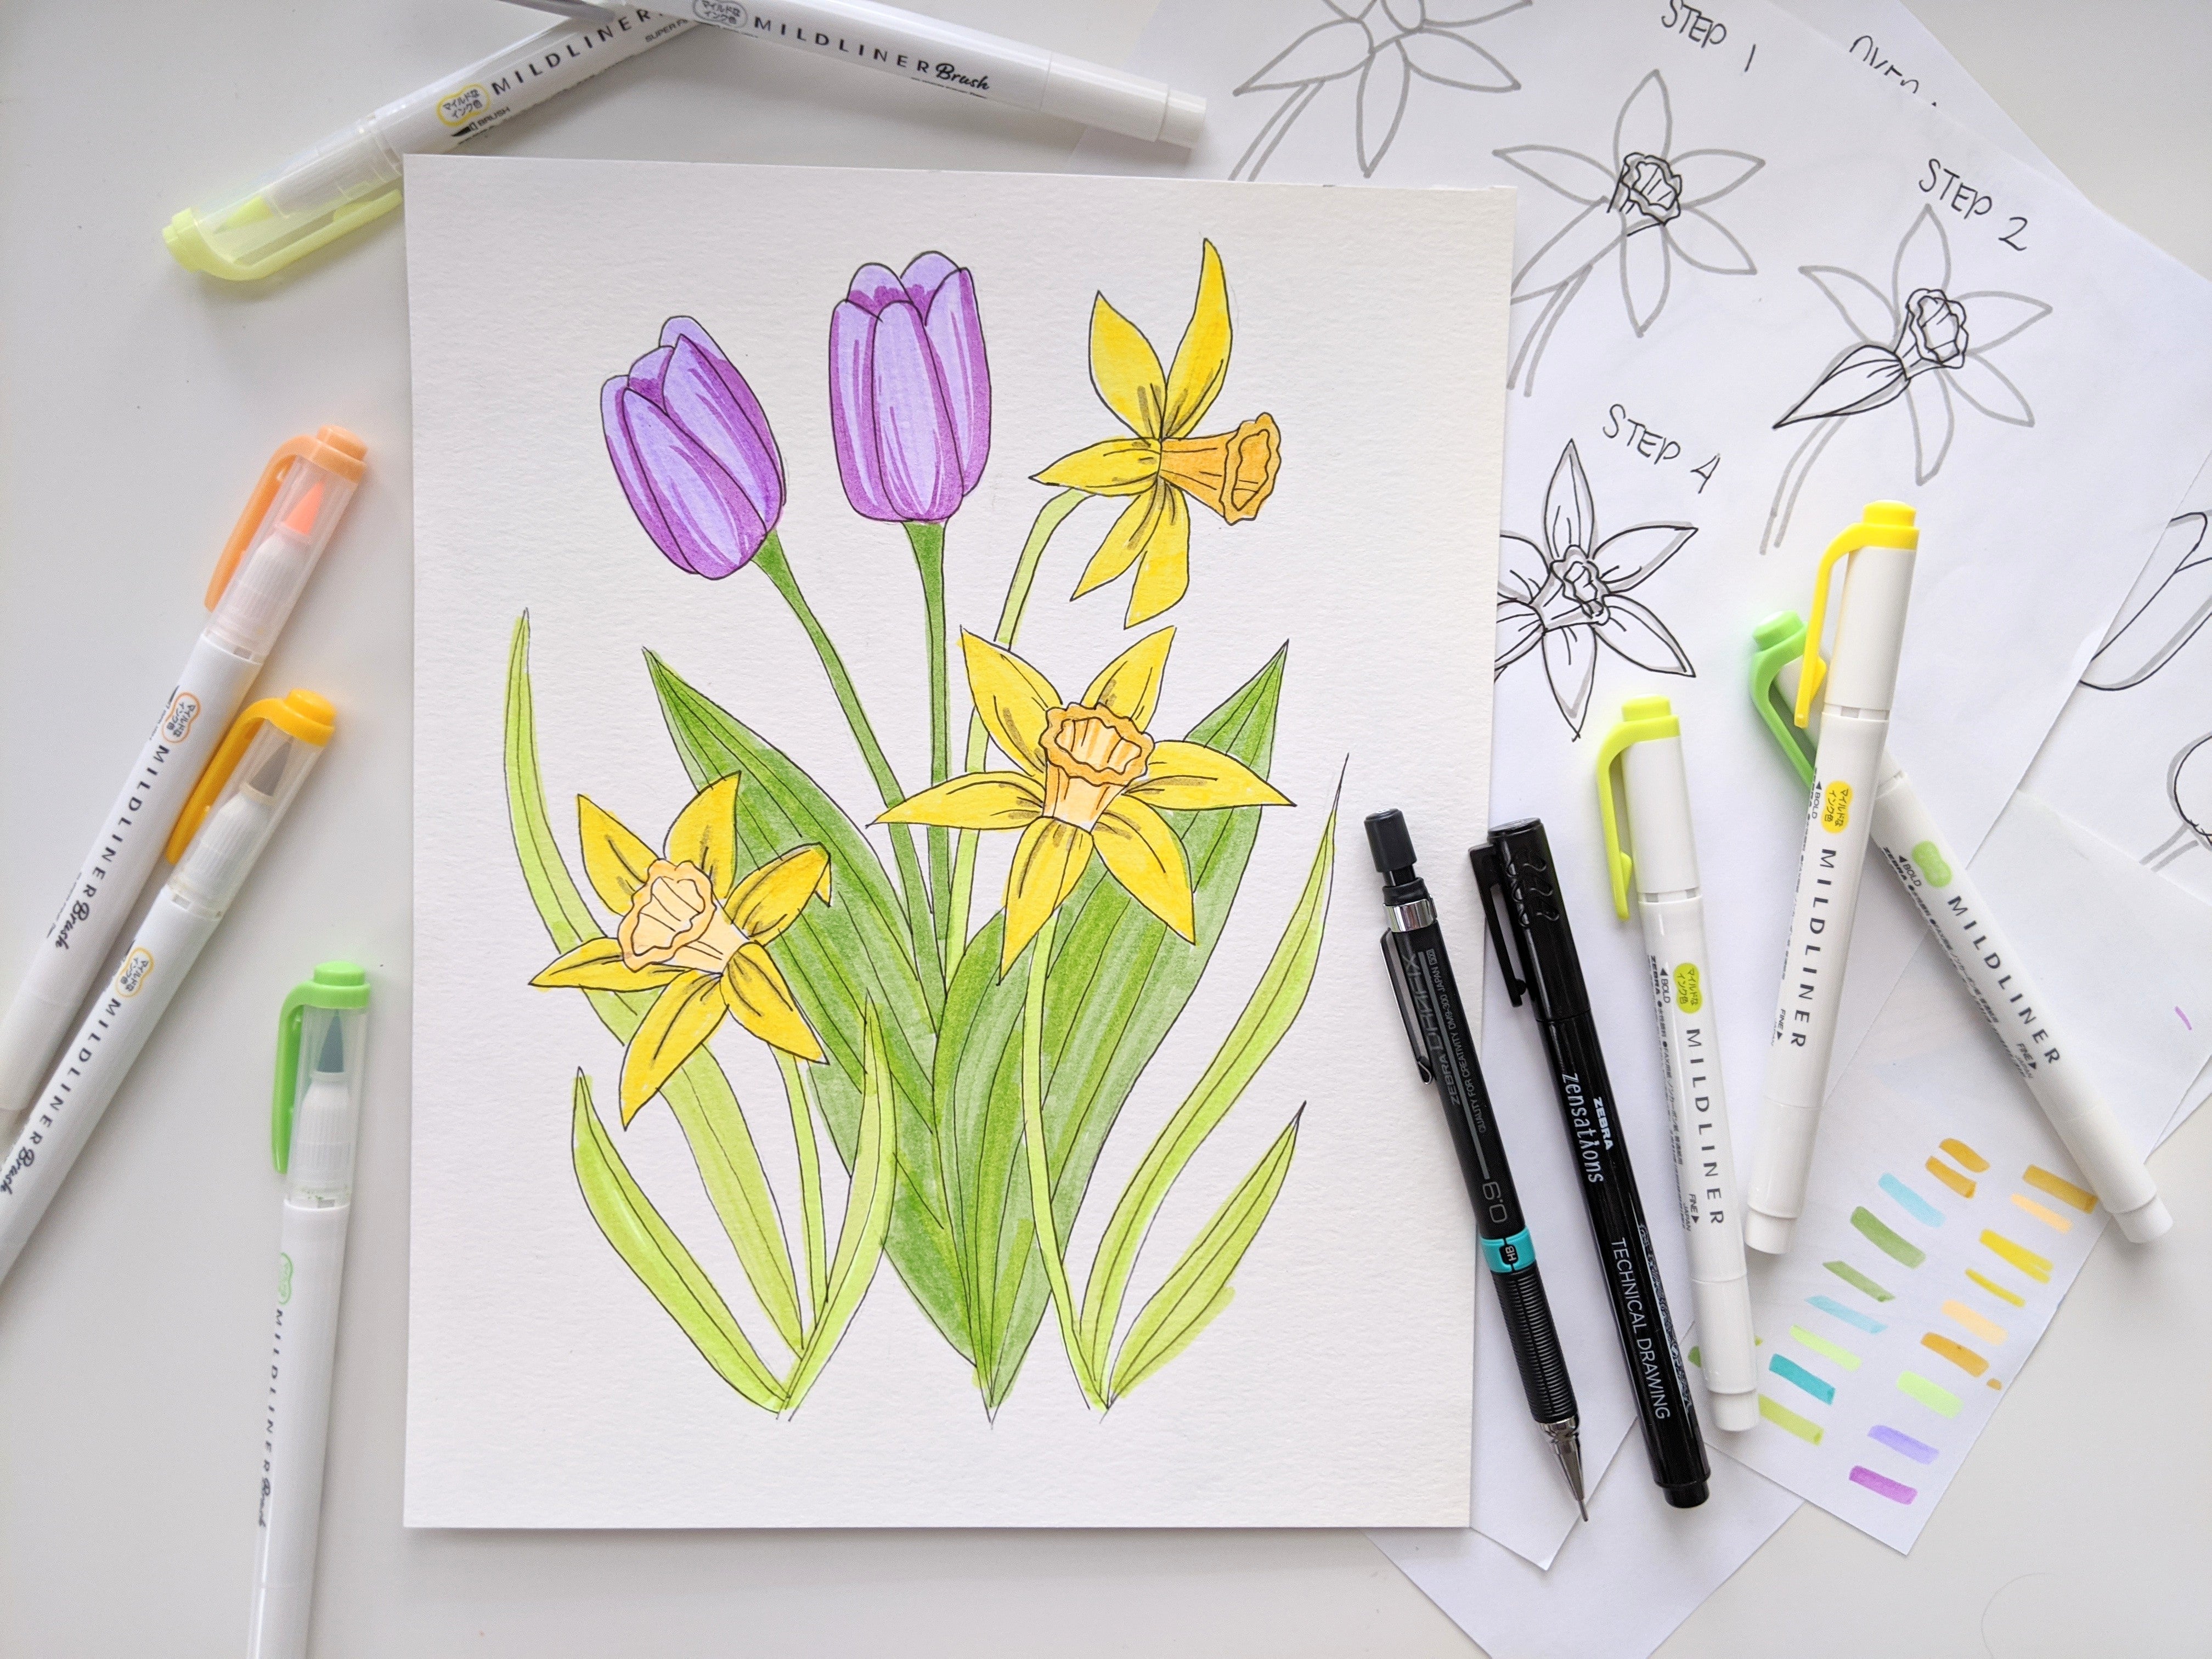
Step 4: Shade with Color
Next, use Mildliner Highlighters and Mildliner Brush Pens to color in your composition. I love the Mildliner Highlighters and Brush Pens because of the bright colors. They will make this drawing pop! The Mildliner Brush Pens are exceptionally great for coloring in the drawing because the brush tip allows you to cover a large area quickly, but also keeps the edges crisp and capture small lines and details.
Both the Mildliner Highlighters and Brush Pens have dual tips so you can choose the thickness you want to work with. There are so many gorgeous colors it is hard to choose which to use! For the tulips, I ended up using a light purple as my base color and then added some shading detail with a deeper purple. I went with classic yellows for the daffodils, but it would be fun to mix it up!
Bonus Project Tips
This project would also look great using Zensations Colored Pencils! If you wanted extra color, you could draw the flowers with ClickArt Retractable Marker Pens or Sarasa Clip Gel Retractable Pens instead. You could also add in more line shading with these colorful pens. I love the idea of turning this colorful spring drawing into a card to give to someone special!
Step 5: Admire the Result
Admire your beautiful work. Well done!
I hope you’ve enjoyed this tutorial! For more drawing inspiration, check this How to Draw a Wombat with Pointillism tutorial.