How to Create Perfect Calligraffiti (2 Different Styles)
Hi! I am Kathy Froerer from @Morties.Ink and I am going to show you how to create graffiti calligraphy, also referred to as calligraffiti. I have chosen two simple printed forms with some fun embellishments to make them graffiti-fun.
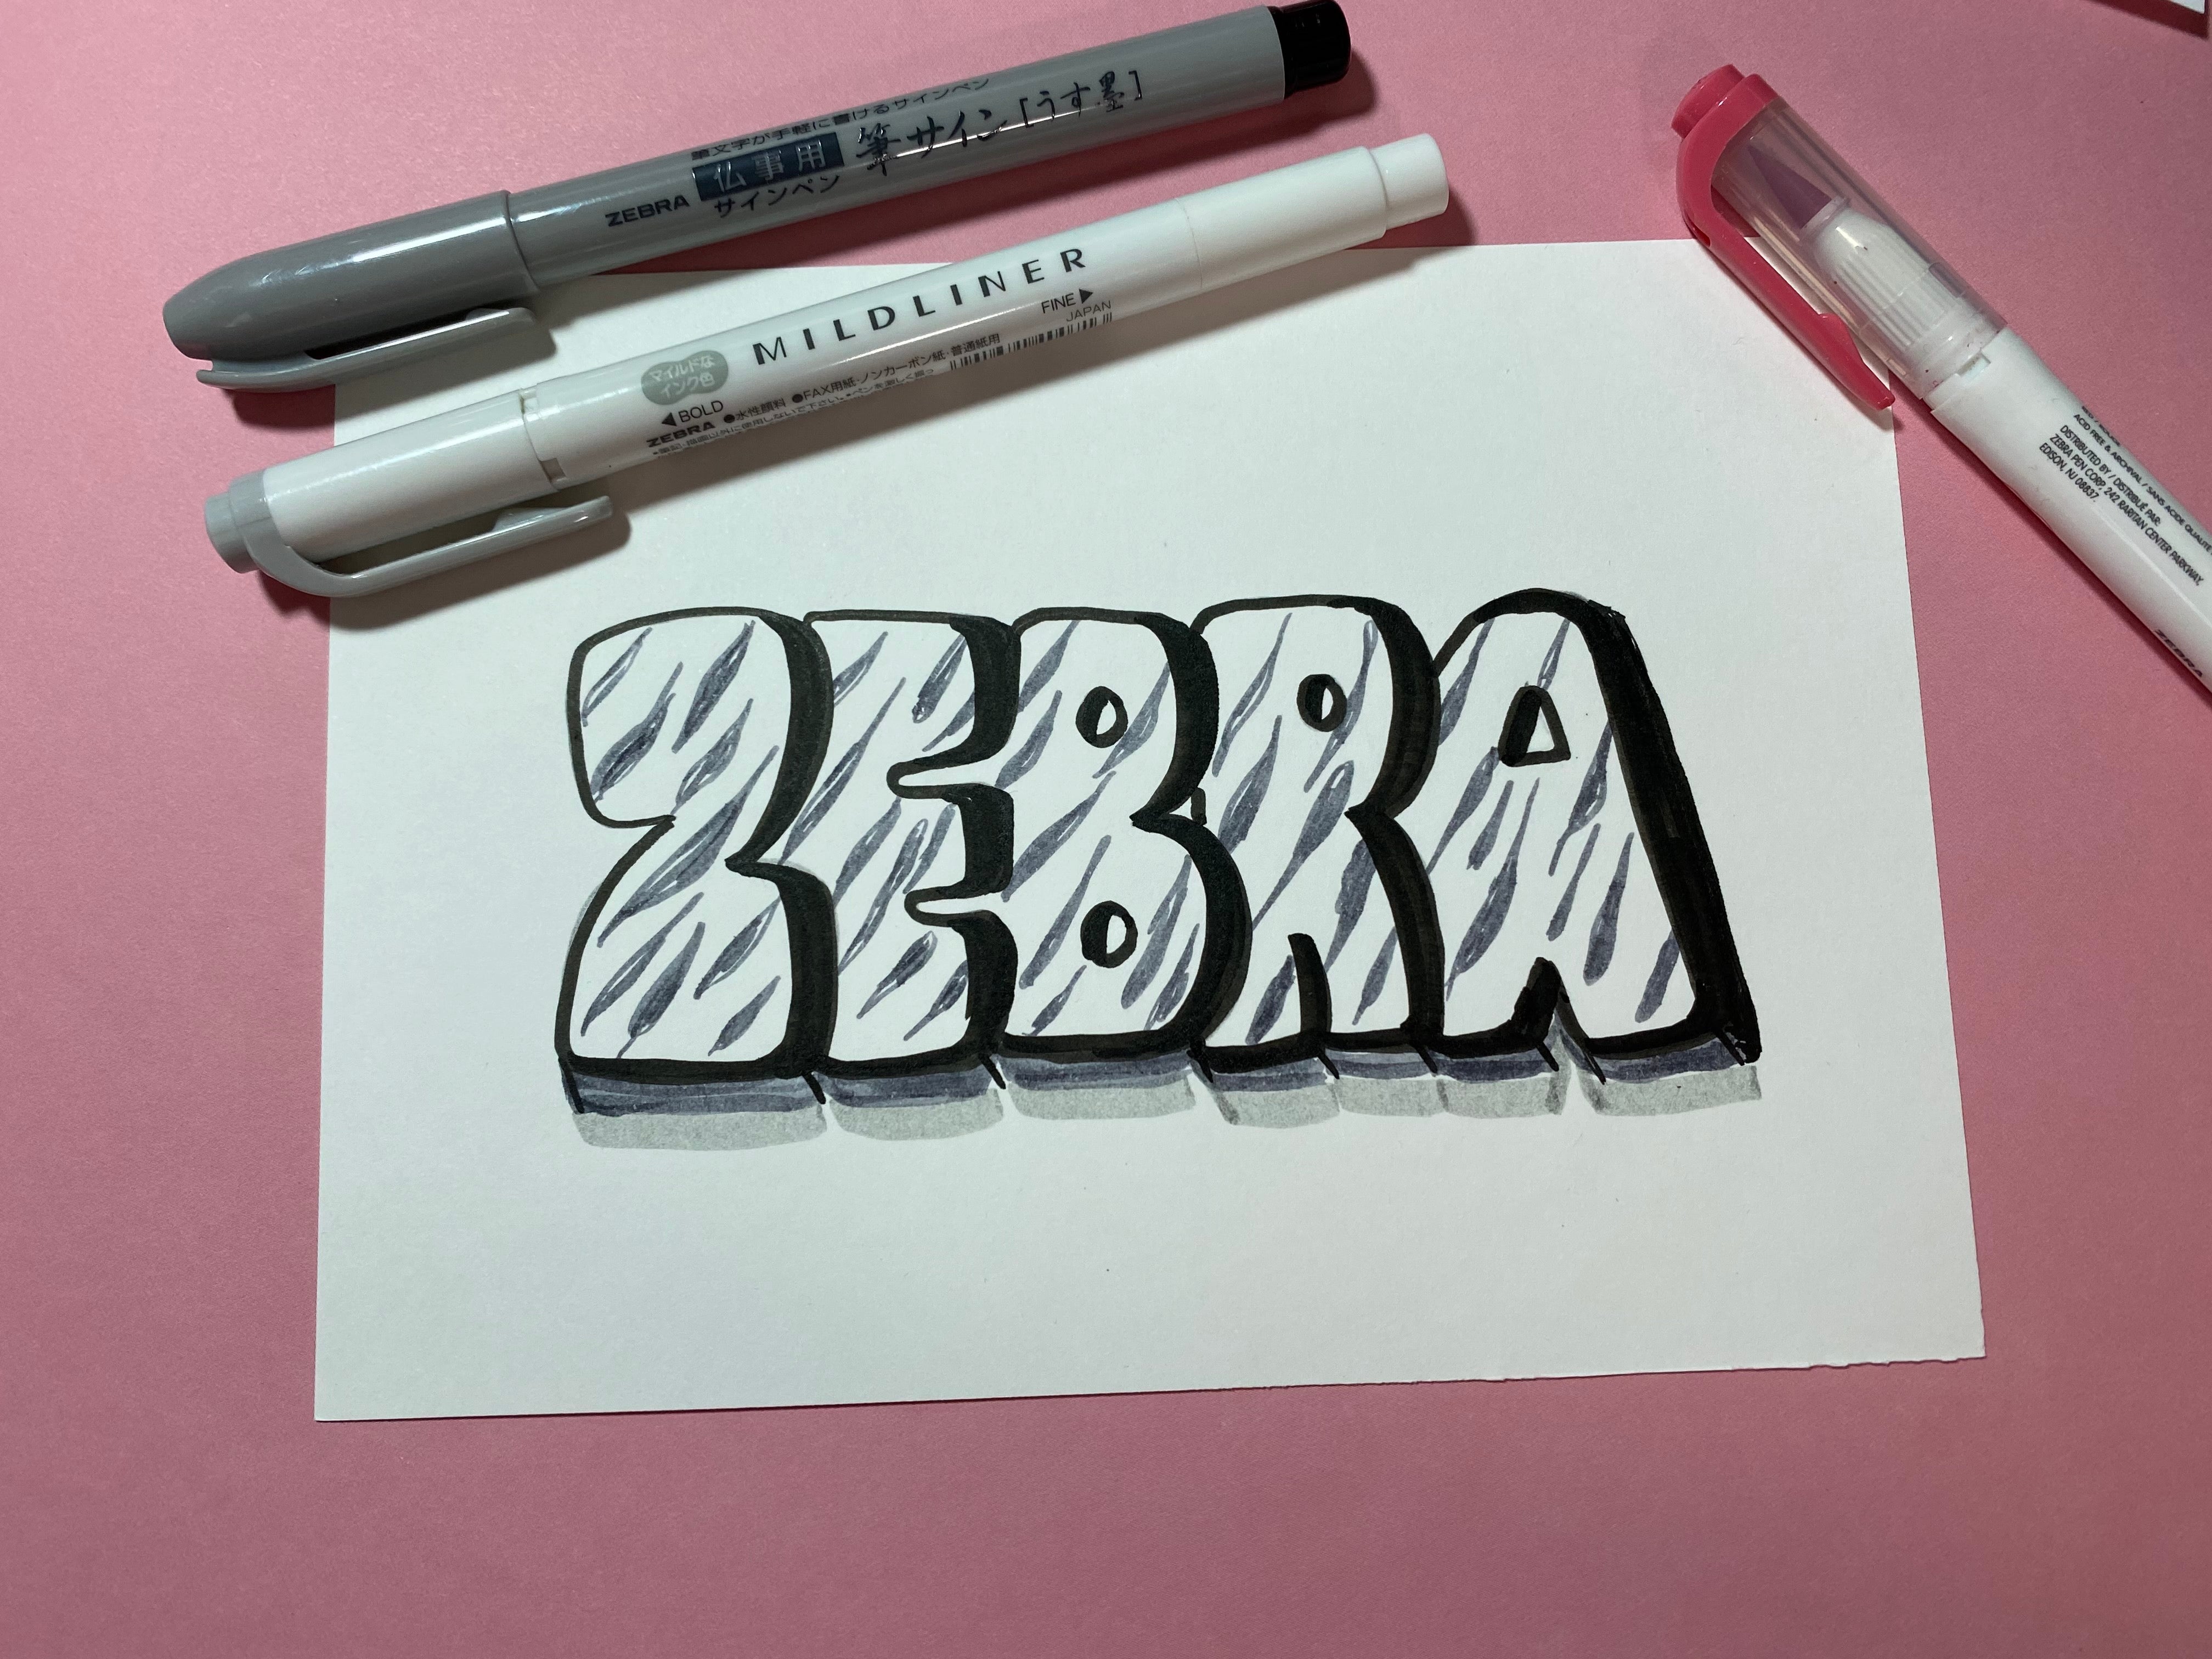
To begin this first calligraffiti design, I started by sketching out the word “zebra” on graph paper using the ZEBRA Brand DRAFIX Technical Pencil. Using graph paper allows you to easily keep it to scale and use it as a template for the future. If you don’t have graph paper or a light box, I recommend starting on your final sheet of paper. Next, I placed it on my light box and traced it onto my piece of paper. I chose to use hot press watercolor paper which is 140 lbs and 25% cotton. It is very smooth so is easy to color when using markers, watercolors, or even pencils.
Step 2: Trace over your bubble letters
Next, I traced over my bubble letters with the Zensations Brush Pen in Black and the Mildliner Highlighter in Gray. These products together allowed me to create the dark outline and shadow on the right side of each letter and along the bottom. This effect makes the letters “pop” and mimics a graffiti-like look. When making your shadow effects, remember to visualize the sun coming from a specific direction. In this case, the light source would be high and left of the letters, making the shadow fall to the right and bottom of each letter.
Step 3: Practice your embellishments
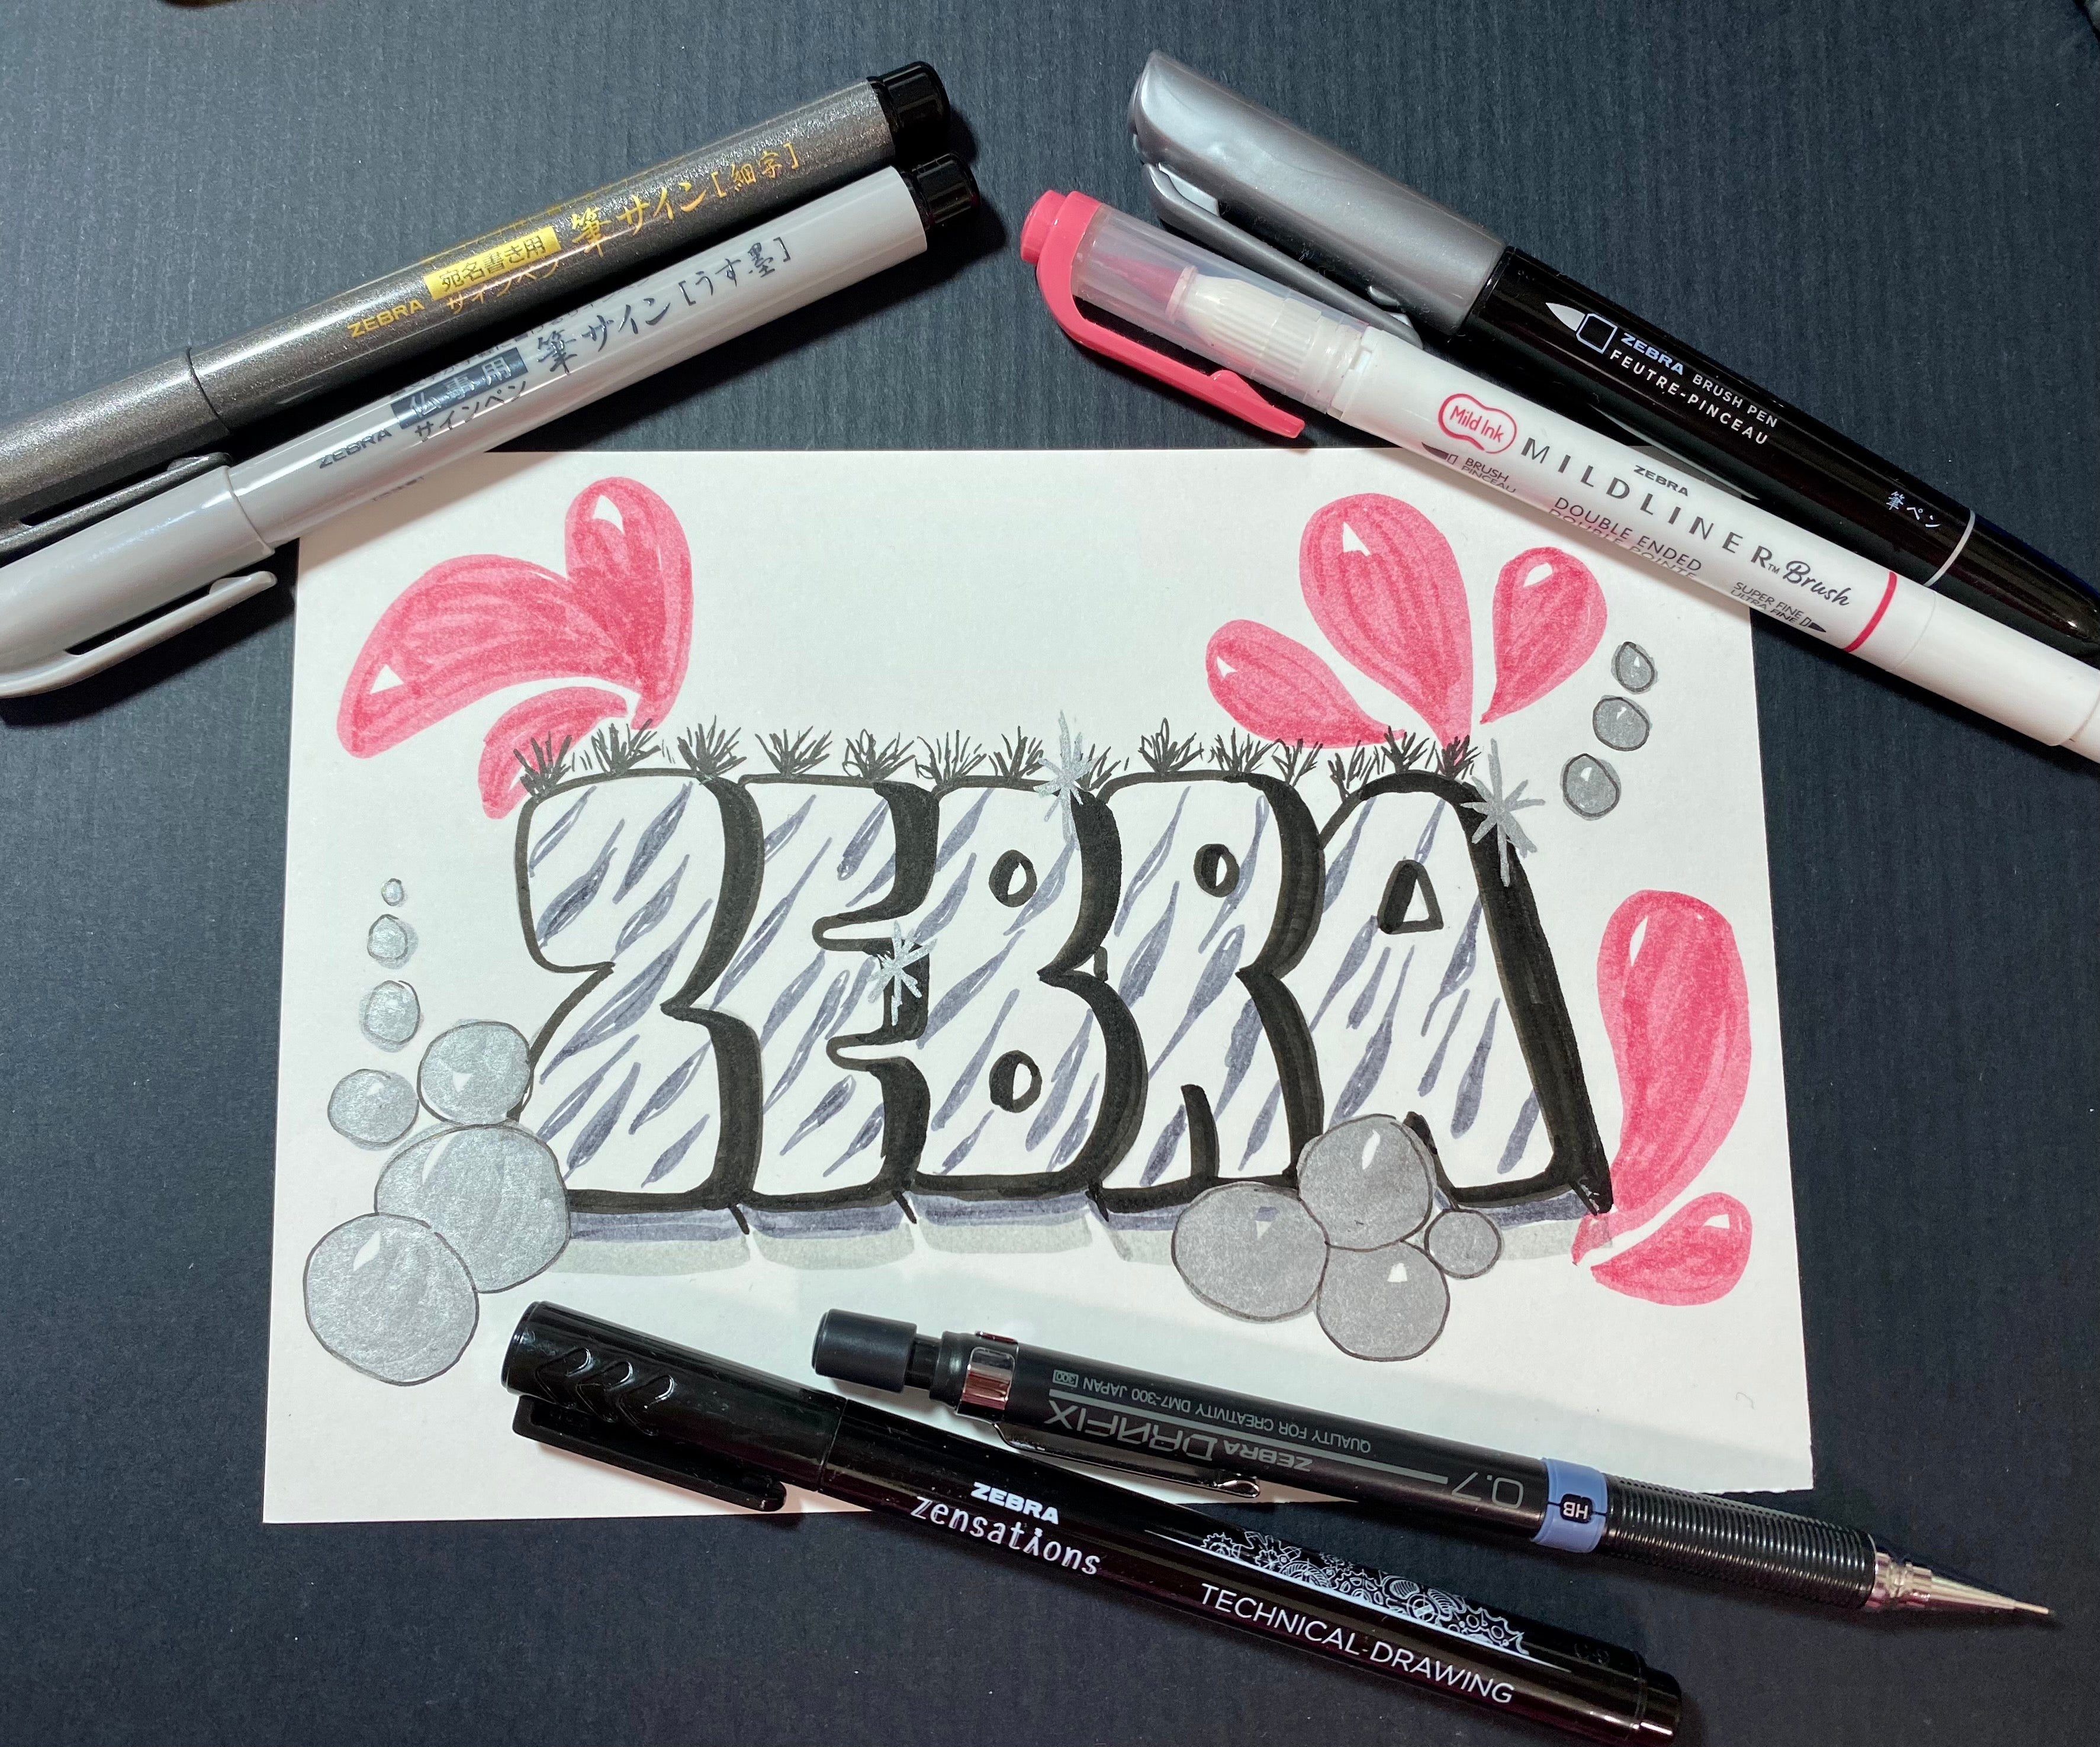
Next, let’s practice embellishments that we’ll add to your letters later to make it more fun. I used the Metallic Brush Pen in Silver and the Zensations Technical Pen to create silver metallic bubbles and the Mildliner Brush Pen in Pink for pink paisley splashes. For the zebra stripes, I relied on the Mildiner Highlighter in Gray and used the Zensations Technical Pen again for small black hair/mane strokes. Each of these brings the depth and fun to the simple word “zebra.”
Step 4: Apply your embellishments to your letters
The final step is to take the embellishments you practiced in step 3 and apply them to your letters for the ultimate calligraffiti look.
Calligraffiti Style 2: Chick
Step 1: Sketch your bubble letters
To begin this second calligraffiti design, I sketched out the word “chick” onto paper again using the ZEBRA Brand DRAFIX Technical Pencil. Again, I used graph paper and a lightbox, but feel free to skip these steps and start directly on paper if you would like. To make the word, “chick” come to life, I made the two Cs into chick shapes by adding legs and feet, tail and crest feathers.
Step 2: Outline and shade your letters
Next, outline the letters with the pointed end of the Mildliner Highlighter. It is easier to fill them in if you have an outline to follow. Once outlined, begin shading in your letters with the bullet end of the Mildliner Highlighter. Continue until all of your letters are shaded in.
Step 3: Add the finishing touches
Once you have shaded in all of your letters, it’s time to add finishing touches. By adding simple gray strokes at the bottom of the letters, it gives the impression of shadow while the small white touch at the top of each letter gives the idea of emphasis or shine. The light source would be coming from the top and to the left. These are simple words with easy additions to give them an illustration or graffiti look. For more lettering inspiration, check out How to Add Shadows to Calligraphy next.


 Step 2: Trace over your bubble letters
 Step 3: Practice your embellishments
 Step 4: Apply your embellishments to your letters

 Step 2: Outline and shade your letters
 Step 3: Add the finishing touches