
It’s that time of the year again—back-to-school season! Amid all the preparation for the new school year, it’s also time to get back into the routine of taking notes. In this tutorial, we’ll go over a step-by-step guide to color code your StudyGram notes!
Hey everyone, this is Christine from @studybeanthings on Instagram, and today, I’ll be showing you how to create study notes that will not only be visually pleasing, but also aid in comprehension for whatever subject you’re studying. This article will include some tips and tricks to keep your notes organized to your preference, while keeping them fun and stimulating to look at. Color coding is especially important in taking notes. With so much information on one page, this guide will keep you focused and excited to study for your upcoming exams!
Materials
Below is a list of items I typically use for my StudyGram notes:
- Mildliner Brush Pen (15pk): The Mildliner Brush Pen is my favorite because its colors are more pastel and mutable shades. It is double-ended, so you get a brush pen on one side and a fine tip marker on the other. You can use it for calligraphy, hand lettering, and simple color blocking.
- Sarasa Clip Gel Retractable Pen (24pk): The Sarasa Clip Gel Retractable Pen has non-smearing ink, which is essential for note taking. The gel ink makes writing super smooth and the vibrant colors are a plus!
- Zensations Technical Drawing Pen (6pk): This drawing pen is awesome for drawings, sketching, or writing. It comes in various point sizes (from 0.1mm to 0.8mm) for precise control. I usually use it for subtitles because the black ink is so bold!
- Zensations Brush Pen: This brush pen is always a solid choice when it comes to calligraphy and hand lettering. It’s perfect for titles on notes. It also comes in a variety of point sizes. In this tutorial, I use the Zensations Brush Pen in Medium.
- Paper: I prefer graph paper because it makes it easy to space out your notes, but any paper will do.
- Stickers/Doodles: Making notes exciting to look at plays a part in the excitement of studying. I like to use stickers and doodles to spice up the white space in my notes!

Step 1: Create Your Page Title
When beginning your StudyGram notes, you want to give yourself a loose guideline about what information you want to put on the page. I usually take the information I gathered from class and the information I deem important from the textbook and consolidate into one set of notes.
You may also want to choose a theme for your note page! In my note set, I used the Mildliner Brush Pen in Mild Red, Mild Vermilion, and Mild Gold to go for a warm-toned theme. Throughout the tutorial, you’ll see me using the Mildliner Brush Pen often because I enjoy using it for highlighting, color blocking, and decorating.
When creating your title, don’t be afraid to get creative with it! Part of the fun of making these notes is to be proud of how it looks at the end, so make it look the way you want.
I used the Mildliner Brush Pen in the three colors mentioned above to create a wavy striped background for my hand lettering to go on top of.
After creating the colorful band, I used the Zensations Brush Pen in Medium to write out my title and the Sarasa Clip Gel Retractable Pen in Black to add some definition to it.
Step 2: Write Your Subtitle
Study notes can get tricky with all of the different headers and sections you want to include, so it’s important to define them clearly to keep yourself focused. For my subtitle, I used the marker tip of the Mildliner Brush Pen in Mild Red to differentiate between my title and my subtitle.
Step 3: Structure Your Text
Text-heavy subjects will require a lot of color coding to keep your information easy to read. I used the Sarasa Clip Gel Retractable Pen in Black and Fuchsia for the text.
Black ink is a must for the general information you want to include. I used Fuchsia for more detailed information. I like to draw out arrows to indicate the flow of information from general to more detailed.
Step 4: Highlight Your Text
The important part about highlighting is to refrain from highlighting too much. The power of highlighting comes from minimalism, so it’s important to examine your notes thoroughly and pick the most important information to highlight. For example, if you have vocabulary words in your notes, you may want to highlight the word and write out the definition in text.
I used the same Mildliner Brush Pen colors used in the page title to highlight important words or phrases.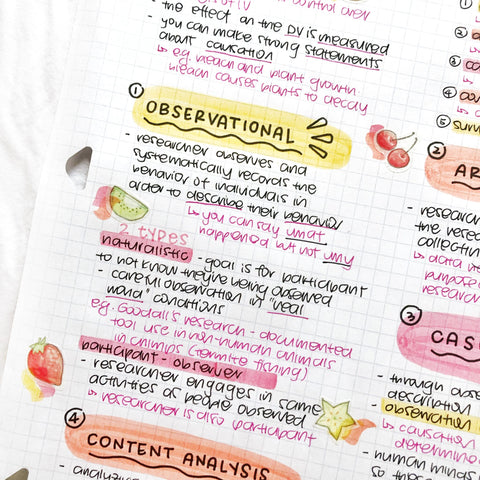
Step 5: Adding Subsection Headers
Sometimes you will have to add more subsection headers to your notes, depending on how you organize your information. In my case, I had more subsections to go in-depth with, so I created more headers!
To do this, I used the Mildliner Brush Pen again to create colored backgrounds for the headers. The brush on this pen is perfect for color blocking like this.
Once color blocked, I then used the Zensations Technical Drawing Pen in 0.8mm to write out the subsection header. This creates a fun contrast between light and dark.
Step 6: Decorating Time!
After you’ve put all your information down, you’ll most likely have a full page of words and some color, but still a lot of white space. To fill these in, you can add some doodles or stickers .
I like to do this by using the Mildliner Brush Pen and drawing in blobs of color in the white spaces around my text. After, you can add some doodles or stickers that you might have to make your notes cuter!
And there we have it! You’ve finished your StudyGram notes! I hope you’re feeling prepared and inspired to create your own StudyGram notes to help you in your studying journey! For more creative tutorials, check out the Guide to Beautiful, Effective, and Productive Study Notes.